BBQ Cheeseburger Pie

The first time I served the Impossibly Easy Cheeseburger Pie (from the Bisquick box) they were ready to request it again.  This is my spin on the already approved recipe.  Once you've tried this recipe, you'll be able to come up with some yummy creations that will suit your family's tastes!

What you'll need:
   1 lb ground beef
   1/2 c or more shredded cheese
   1 box of cornbread mix
   ingredients to make corn bread (for Jiffy: 1/3 c milk and 1 egg)
   

Preheat oven to 400.
Brown a pound of ground beef and drain off grease.
Place beef in baking dish and stir in your favorite bbq sauce...make sure that all the beef is coated with sauce.
Evenly distribute beef in dish and top with shredded cheese (I used cheddar, but you could use whatever kind you like best or have in the fridge).
Whip up a box of cornbread (I usually have Jiffy on hand).
Pour cornbread mixture over cheese and gently spread cornbread to completely cover cheese and beef.
Bake for 20 minutes.
Enjoy!!!


Happy baking!


Kitchen Tips

Ever travel with a baking dish?  You know what I mean...you've prepared a dish for a potluck or get together and now you have to transport it from home to location in one piece or at least in the dish!  I have this little brown dish and I rescued from my mom's pile of throw-aways (I have no idea why she felt the need to put it in the trash pile in the first place, especially without asking me first!).  It was the chosen dish for a yummy dip that I was taking to a get together, but I wanted to make sure the dip stayed in the dish.  What's a girl to do?!


RUBBER BANDS!!!

I rescued these two little rubber bands from the useless ad paper that's thrown in our yard every other week.


Needing to fill large tube pasta...like manicotti???


Put the filling in a large zip top bag, seal, snip one corner and wah-la!
Now you can easily fill each pasta tube and have dinner in the oven a lot sooner.

If you have any handy kitchen tips you love and use, please share!

Happy cooking!


Bread fit for The King

So everyone knows that Elvis enjoyed bananas with his peanut butter.  I'm not sure if he was a fan of chocolate, the loved chocolate covered peanut butter candies were first introduced in the late 1920's, so I'm guessing he might have enjoyed the delightful combination.

When I first saw this recipe, I immediately thought of one of my dear friends who is a big fan of banana bread.  She would store very ripe bananas in the freezer, saving them for banana bread at the most perfect time.  I'm dedicating this recipe to my housemate, CA, for her birthday!


The picture doesn't do it justice...it's pretty amazing!

Reese's Peanut Butter Banana Bread
   3 very ripe bananas
   1/2 c peanut butter
   1/4 c oil
   1 egg
   1/2 c granulated sugar
   1/4 c brown sugar
   1 1/2 c all purpose flour
   1/2 tsp baking soda
   1 1/2 tsp baking powder
   1/2 tsp salt
   8oz bag of Reese's Mini cups

1. Preheat oven to 350.
2. Grease loaf pan.
3. In a medium bowl whisk together your flour, baking soda, baking powder, and salt.  Set aside.
4. In a large bowl stir together your bananas, peanut butter, oil, egg, and sugars.
5. Pour your dry ingredients into wet ingredients and stir until just combined.  Batter will be lumpy.
6. Fold in your mini cups and spread batter into prepared pan.
7. Bake for approx 1 hour or until toothpick inserted into center comes out clean.
8. Let cool in pan for 10 minutes, then loosen edges of bread from pan using a knife and remove loaf from pan.  Transfer bread to a cooling rack to finish cooling.

Note on recipe: If you notice the bread browning too fast, lower the temperature down to 325.

Thanks to Cookies and Cups for the recipe!

Happy baking!


Cookies..chocolate chip

Growing up with a bakery in the backyard has it's advantages...cookies fresh from the oven are the greatest!   Chocolate chip cookies are one of my favorites. I'm always on the look out for chocolate chip cookie recipes.  I found one that the New York Times claimed as the best...and with a ranking like that, how could I not try them to see if they really are the best?!

First of all, before you attempt this recipe, you should know the number one rule to baking: read the full recipe before starting!

This recipe calls for some ingredients that you may not have in your pantry like cake flour, bread flour, and sea salt.  And for the record, I didn't have bread flour in my pantry, so I had to use all purpose flour...and there is a difference.  Click here for a little education on flour differences!


Click here for the printable version of this recipe...Thanks, My Baking Addiction!

Happy baking!


time...

I just realized that it's been awhile since I've posted anything on my little cooking blog.  That doesn't mean I haven't cooked or baked anything, because I did!  I had the opportunity to do some baking with a friend and we decided to try out a recipe that I had pinned on Pinterest...peanut butter cupcakes with chocolate buttercream icing.

The recipe needs a little adjusting...it could be just the type of ingredients we used.  The recipe calls for butter (what good recipe doesn't?!) and sour cream.  I only had stick margarine and low-fat sour cream...after trying the cupcakes, we think that maybe these ingredients caused the main issue of dryness.  We're going to be testing this recipe again and I'll update you on the adjustments we made.


Click here for the peanut butter cupcake recipe...Thanks to Your Cup of Cake!

Click here for the chocolate buttercream recipe...Thanks to Savory Sweet Life!

Happy baking!


Easy Monkey Bread

Any recipe that can be created, made and posted all in one Sunday morning meets the criteria of being quick and easy.  I could have easily adapted some other recipes for my one can of biscuits, but that's not as much of a challenge.

You'll need to preheat oven to 350 and while that's warming up,
tear pieces of the biscuits to make 1 inch balls...


In a small bowl, melt butter, then add sugar, brown sugar, and cinnamon with a whisk.  Because I only had 1 can of biscuits, I used my bread loaf pan and sprayed it with cooking spray.  In the picture, you can see that I poured some of the sugary mixture into the greased pan as a base for the dough balls that would go in the pan first.

Than add all dough balls to pan and pour on the remaining sugary mixture, coating evenly.


Bake for 35 minutes.

Then comes the magic!


Place plate over pan and flip!


Yummy!

Watch your fingers when reaching for a piece, this stuff goes fast!


Easy Monkey Bread
   1 can of biscuits (buttermilk kind)
   1/2 stick butter, melted
   4 Tbsp sugar
   5 Tbsp brown sugar
   1 tsp cinnamon (I just sprinkled some in...didn't actually measure)


Happy baking!


2 Minute Chocolate Cake

Does your sweet tooth ever drive you crazy?!  You might be reading this post because you didn't believe the title...chocolate cake in 2 minutes?  NO WAY!!!  Well...way!

I had this saved on my Pinterest, but forgot about it until tonight.  A quick check of the recipe to make sure I had all the ingredients (cause no one wants to get their hopes up when it comes to chocolate) and I was headed to the kitchen.

This recipe is also the kind you can mix up in one bowl.  Just start with the egg and beat it lightly and then add the remaining ingredients and whisk together.


Then pour into your coffee mug.  The blog said you could use a regular sized mug, but mine is taller than most and when "baking" in the microwave, it raised up over the mug and could have potentially baked over a regular sized mug.


Ta-da!

 Salted Caramel Mug Cake
   4 Tbsp all purpose flour
   4 Tbsp sugar
   3 Tbsp unsweetened cocoa powder
   1/4 tsp baking powder
   1/4 tsp salt
   1 egg, beaten
   3 Tbsp skim milk
   1 Tbsp vegetable oil
   2 salted caramels

   1. Into a small bowl add all ingredients except caramels and mix to combine.
   2. Pour mixture into a regular sized coffee mug.  Drop caramels into center of mixture one at a time.
   3. Microwave on high for 90 seconds.  If needed (if cake batter is still gooey), microwave on high for up to an additional 30 seconds.

Click here to go to the blog where you can find more coffee mug treat recipes!
Thanks to Babble for a quick treat to quite the sweet tooth!

Happy baking!

Crockin' Hawaiian BBQ Chicken

I love chicken!  I could probably eat chicken everyday...however, my husband isn't as big a fan of chicken.  Which means I have to find lots of chicken recipes to change things up.  I pinned this easy recipe on Pinterest and have been waiting for the right time to make it AND to find the right bbq sauce.  The recipe calls for a bottled Hawaiian bbq sauce, which I can't find at any of my grocery stores.  We even ventured to a town that has a Target to look for the sauce the original pinner used...but guess what, that's the sauce they were all out of = bummer!  I then looked up a recipe how to make some homemade Hawaiian bbq sauce...and the repeating ingredients that the recipes called for were ginger, teriyaki, and soy sauce.

If you ask my family what my favorite store is they'll say Aldi's...and they'd be correct (favorite food store).  Paul and I did our weekly grocery shopping today and while at Aldi's I found bottles of ginger teriyaki bbq sauce...cha-ching!  I swipped up a couple of bottles, which were actually a specialty item on sale.  Guess what's for dinner?!

I love recipes that have very few ingredients...this one has a total of 3!
The original recipe calls for crushed or tidbit pineapple, but all I had was sliced...so I ran a knife through them before dumping them in the cooker.


The recipe said to turn the cooker on low for 6 hours...but since I didn't have 6 hours, I turned it on high for 3  hours and then down to low for the last hour, but you can do whatever works for you...as long as the chicken is no longer pink.


After completing this recipe, there's something I'll do differently next time.  The recipe calls for everything to just be dumped in...since my pineapple wasn't the crushed kind, I don't feel I got as much flavor as I was wanting from the sauce because of how much pineapple juice there was.  I'm probably going to add the pineapple and bbq sauce and then save the pineapple sauce to add gradually as the chicken cooks.

I also wasn't as pleased with the sauce that I got...I think I'll try adding some brown sugar and soy sauce to it to bulk it up a little.  The sauce probably would have been fine had I been able to fine the Hawaiian bbq sauce at Target...I'll just have to keep looking.

Happy cooking!


Christmas Feast 2011

We hosted Christmas at our house this year...making for a total of 9 people and 2 dogs in our house!  It was a little chaotic at times, but it's the holidays, right?!

Our pretty little Christmas tree!
(never mind the section in the middle that the lights went out :) )


On Christmas Eve we had a little feast of finger foods which included:
veggie tray
spinach dip
fiesta ranch dip
summer sausage, cheese and cracker tray
cocktail weenies
shrimp cocktail
peanut butter balls
Oreo truffles
chocolate-peanut butter fudge
sausage stars
jalapeno poppers


Recipes:

Spinach Dip:  This is something my parents have made for several years and I don't have the recipe...so I can't share it with you!

Fiesta Ranch Dip: A co-worker made this for a party we had and I fell in love!  I know, what?!!  I like something that's ranch?!  That's because it tastes nothing like ranch.  I didn't even know that they had this kind of ranch packets in the dressing aisle.  It's with the dry packets that you can just add to sour cream.  For this recipe: you'll need a 16oz container of sour cream, 8oz block of cream cheese, shredded cheddar cheese,  and a fiesta ranch packet.  Mix together and enjoy!  Great on crackers, especially the honey wheat Wheat Thin stix.


Cocktail Weenies:  I use the only recipe I know...chili sauce, grape jelly, cocktail weenies and a crockpot!

Peanut Butter Balls:  All my cookbooks called for the recipe to be cooked...which I wasn't going to attempt on my day of prep...I wanted simple and quick results.  I found this recipe and cut it in half.  

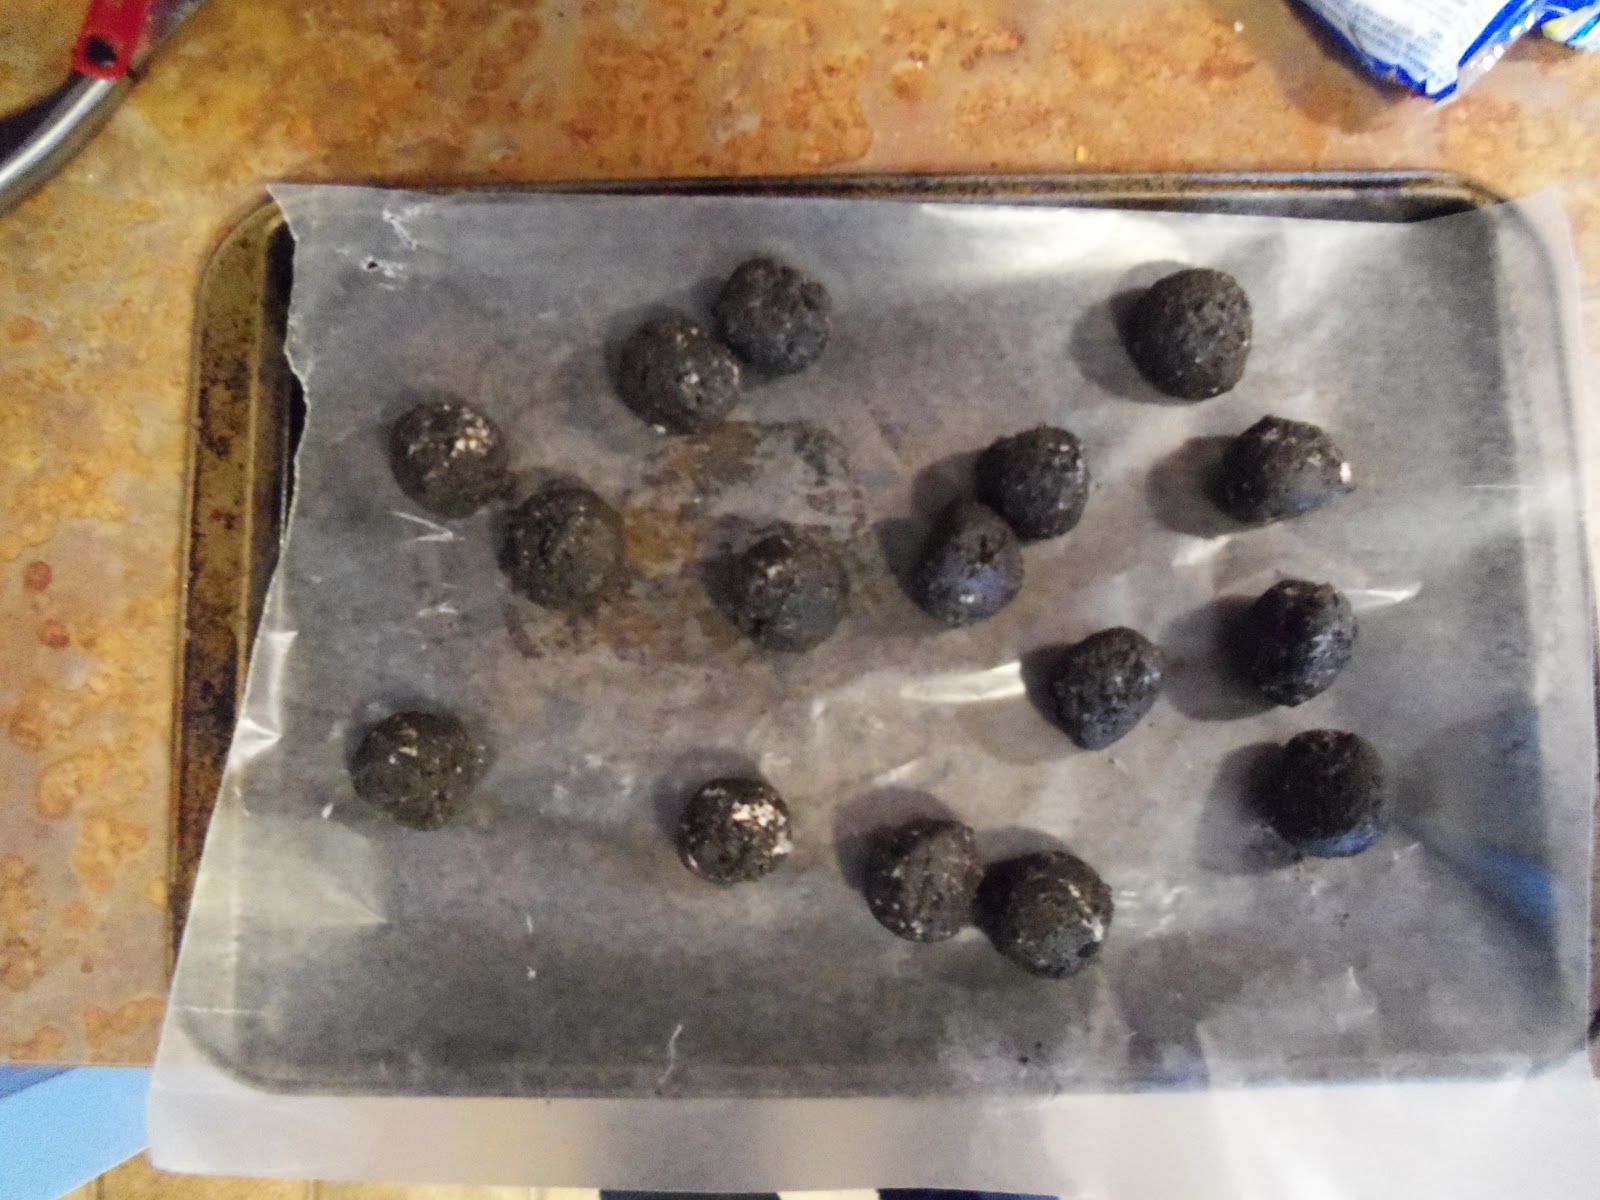
Oreo Truffles:  This is another super simple recipe...a pack of Oreo's and 8oz of softened cream cheese.  Crush the Oreo's in a freezer bag.  Combine crushed Oreo's and cream cheese in a mixing bowl and mix until you have a thick chocolate mixture.  Put mixing bowl in freezer for 10-20 minutes...when the mixture is firm, it's much easier to work with and roll into balls.  I put them on a wax paper lined cookie sheet and put back in freezer while I'm melting the dipping chocolate.  Melt the white chocolate in the microwave in 30 second intervals (you don't want burnt chocolate).  Once chocolate is melted, dip the truffles and coat and put back on wax paper cookie sheet.  I usually end up dipping the truffles twice because the first time, chocolate bits get stuck in the white chocolate and they don't look as pretty.  So, once the first coating is dry, I melt more chocolate and dip again.  You can use any flavor of Oreo's...this year I used peppermint and the girls loved them!


Fudge:  I made easy (no marshmallow fudge), but used 3 different kind of chips...milk chocolate, semi-sweet and peanut butter.  The recipe calls for 3 cups of chips (I did 1/2 peanut butter and the remaining half was a mixture of mostly semi-sweet and milk chocolate).  After making a recipe of chocolate earlier, I realized that using all milk chocolate chips was a little overwhelming, so I decided to mix the chocolates so that I could get a good chocolate flavor and it worked!


Sausage Stars:  These are my little brother's favorite Christmas Eve treat.  And they're easy to make!  You'll need browned ground sausage, ranch dressing, shredded cheddar cheese and wonton wrappers.  Combine sausage, cheese and dressing to make the filling.  Add a little bit of dressing at a time...you don't want it too runny.  You can store the filling in the fridge until you're ready to make the stars.


I used a mini muffin tin, but you can use a regular muffin pan if that's all you have.
Preheat oven to 350.  Place a wonton wrapper in each opening and then spoon half a spoon of the filling into each wrapper and bake for 10-15 minutes, until cheese is melted.

Jalapeno Poppers:  I posted this recipe in a previous post.  I prepped the filling the day before which allowed the flavors to infuse the cream cheese more and made the poppers taste even more amazing!


Christmas Dinner

After homemade waffles were served and gifts opened, the cooking for lunch began!  Our lunch included:
ham
green bean casserole
cornbread corn
sweet potato casserole
broccoli mac and cheese
noodles
mashed potatoes
rolls
pumpkin pie
apple streusel pie

Paul started the ham in the roasting pan, which made room for everything else to go in the oven at various times.  I used a variation on this recipe for my green been casserole this year...I wanted to change it up a little bit and made it a little more fresh and homemade.  Cornbread corn is a recipe given to me by my college roommate and it's a favorite of one of my step-daughters.  Maybe next time I whip up a batch of the greatness that it is, I'll take some pictures and share it with you...maybe!

Paul requested sweet potato casserole this year, so the recipe search began.  I found this recipe on Pinterest, and after we made it I realized that something was wrong with the recipe, but it still turned out great and everyone enjoyed it!

Sweet Potato Casserole:  I'm going to share the recipe with you and then tell you where I think something needs adjusted (???).
   3 c sweet potatoes
   1/2 c sugar
   1/2 c butter, softened
   2 eggs, lightly beaten
   1 tsp vanilla
   1/3 c milk

Topping:
   1/3 c melted butter
   1 c brown sugar
   1/2 c flour
   1 c chopped pecans

1. Boil and mash sweet potatoes.
2. Beat in sugar, butter, eggs, vanilla and milk until smooth and creamy.
3. Put in 9x13 greased pan and evenly distribute the topping.
4. Bake at 350 for 30 minutes.


??? - If you mix the topping ingredients all together before distributing it on the sweet potato mixture, you'll get a gooey mess that won't spread on the sweet potatoes.  I think what was supposed to happen was: combine brown sugar, flour and pecans and stir to mix.  Then distribute evenly over sweet potato mixture, then pour melted butter over evenly.  And, I'm not sure we used a full 3 cups of sweet potatoes, my dad kind of just eyeballed it, so maybe that would have changed the mixture a bit.  So if you make this before I do, let me know how it turns out for you.

Thanks to Chef in Training for the recipe.

Broccoli Mac and Cheese:  This was a request of one of my step-daughters.  My mom made it for her and she fell in love and requests it several times a year.  It's just a homemade mac and cheese using small shell pasta, velveeta cheese, cream of mushroom soup, frozen broccoli, butter and bread crumbs.  It bakes up nicely and goes fast!

Wow, what a post!  Full of food...and it's making me hungry!

I hope you enjoy some of the shared recipes and that you can try some of them for your New Year's parties or other parties you have in the near future.

Happy baking and cooking!


The Prep

I'm a planner...really.  Ask anyone who knows me and they'll verify that info.  I'm a list maker...I like lists.  I recently downloaded a sticky note app on my phone so I can make lists that are always in the same place!  This being the eve of Christmas Eve, I did a lot of prepping for our Christmas celebrations which begin on Christmas Eve.

My family started a tradition when my brother and I were in junior high where we make a bunch of finger foods and candies to have on Christmas Eve before going to church and then get them all back out again when we get home.  I'm continuing that tradition and did a lot of prepping today.  Here are just a few of the things I started today...jalapeno popper filling, sausage star filling, cutting veggies, making candy, making ice, cheese dip, and the biggest prep - the house!  I'll be sharing some of the recipes and pictures with you, but they'll have to wait.

Happy prepping, cooking, and baking!

Merry Christmas!