Showing posts with label easy. Show all posts

Biscuit Quiche

If you love breakfast food and have never had quiche...you're missing out!  Two words - egg. pie!  Now...here's my problem with it - pie crust.  It's not that I hate pie crust...I'm just not a fan of the extra crimped edge.  I whipped up this quick recipe for a Sunday School breakfast recently and there were just enough leftovers for my lunch!


What you'll need:
 - 1 can buttermilk biscuits
 - 1/2 lb breakfast sausage (cooked and drained)
 - 1/2 to 1 c shredded cheese (I prefer cheddar)
 - 6 eggs
 - 1 c heavy cream
 - seasonings (you pick)

What you'll do:
 - Preheat oven to 375. Grease 9x13 baking dish.
 - Brown breakfast sausage and drain.
 - Tear each biscuit into smaller chunks and layer in bottom of baking dish.
 - Whisk together eggs, heavy cream, and seasonings (I used salt, pepper, garlic powder, and minced onions.)
 - Top biscuit pieces with sausage and sprinkle on cheese.
 - Pour egg mixture over biscuit/sausage/cheese.
 - Bake for 30 min.

Happy baking!


pie oh my

Growing up in the kitchen and with a bakery in my backyard, I might know a thing or two about pie.  If you ask my dad what's his favorite kind of pie, he ALWAYS answers, "there's only 2 kinds of pie...hot and cold."

On a recent trip home, my parents took me to this little diner/cafe not far from where I grew up.  We had lunch and because they are known for their pies, (of course) I had to have a slice.  That particular Saturday, they had a Butterfinger pie in the case and I knew it was the one.  It came on a small mismatched plate and piled high with whipped cream.  From the first bite, I knew I was in love.  It was rich and amazing!  I needed to figure out how to replicate this pie for myself.

This pie had 4 layers that added up to it's amazing-ness.  A chocolate cookie crust.  A creamy peanut butter layer.  A butterscotch pudding layer.  And last, but not least, the whipped cream.  I'd say I'm pretty good in the kitchen, so I set out to find the perfect recipe for the peanut butter layer.  I could figure out just from looking at the pie what the other layers were, but the peanut butter was something special.

(Inspiration pie)


This the perfect pie...it's easy, requires no baking, and is full of flavor.  Here's my interpretation of Butterfinger Pie.  This recipe yields a 9x13 pan of Butterfinger amazing-ness!

Ingredients:
   regular size package of Oreo's
   2 small boxes of butterscotch pudding (+ milk to make)
   1 container of whipped topping
   1 - 8oz block of cream cheese (room temp)
   1 c. peanut butter
   1 c. powdered sugar
   3 small Butterfinger candy bars, crushed

What to do:
1. In a medium sized bowl, make butterscotch pudding and let set up in refrigerator.
2. In a large ziploc bag, crush all Oreo's until crumbles.  Then spread an even layer in a 9x13 pan.
3. In a large mixing bowl, cream the block of cream cheese, add powdered sugar and peanut butter and mix until well blended.  Then fold in about 1/3 of the whipped topping.  Dollop on top of the Oreo crumbs and gently spread the peanut butter layer until covering all cookie crumbs.  Cover and let set in refrigerator until pudding is set.
4. Once pudding is set, take it and the 9x13 out of the fridge.  Spread the pudding evenly over the peanut butter layer.  (At this time, your 9x13 is most likely filled to the top.  If serving now, layer on the remaining whipped topping and top with candy bar crumbles.  If serving later, wait to add the whipped topping and candy bar crumbles right before serving.)


I would guess that this would also make 2 - 9in pies (if you're just wanting to buy the Oreo crust already made).  If that's the case, you might want to purchase another whipped topping to make sure you have enough for both pies to be fully covered and looking pretty.

Happy no-baking!


Simple Dough

Hello, 2015!  While having a mini holiday/vacation from work, I've had some time to look at lots and lots of recipes.  I've been wanting to work on gathering some good base recipes that will be quick, easy, and full of flavor that I could then add other ingredients from the pantry to pull a meal together.  When I come across a recipe that allows me to "clean" up some of my favorite dishes, I've been saving them for experimenting when I have time. I came across this one just a day or 2 ago and because it said the prep time was 10 minutes I decided to try it while the babies were happy and content in their high chairs.

Pizza can be a cheap and easy meal and with this recipe, you know exactly what's in the crust and you can add some of your own extra flavorings.  This recipe literally took 10 minutes and there was enough dough for me to divide and freeze for future pizzas.

What you'll need:
   11/2 c. warm water
   2 1/4 tsp yeast
   1 tsp salt
   1 Tbsp sugar
   1/3 c. olive oil
   4 c. flour
   
What to do:
1. Pour yeast over warm water, stir and let sit.
2. In mixing bowl, add flour, salt, sugar, and mix.  Add the olive oil and use the dough hook, mix for about a minute.
3. Add yeast mixture to the flour mixture and mix until well incorporated.*
4. Remove dough from mixing bowl, shape the dough into a ball, and place in and oiled bowl, rubbing oil on the dough as well.  Cover bowl with plastic wrap and refrigerate.
5. If you're not using the dough right away, you can freeze it.

I divided the dough into 4.  Wrapped one in plastic wrap and put in the fridge. I wrapped the remaining 3 in plastic wrap and placed them in a freezer bag.

When it was time to make the pizza, I pulled the dough out of the fridge, floured the counter and dough and rolled it out.  From here, I placed it on a pizza pan and baked it for 7-10 minutes at 450.  I wanted more of a flatbread/crispy pizza.  After removing from the oven, I added my sauce and toppings (bbq, chicken, and cheese blend).  Then put it back in the oven for 10-15 minutes (I don't really know how long it baked, I couldn't set a timer because the original recipe didn't have anything specific for the dough for baking temp and time, so I just checked on it every 5 minutes).

*Step 3 is where you can add your own flavorings.  I decided to add garlic salt, crushed red pepper flakes, Italian seasoning, and parmesan cheese.  The possibilities for extra flavor are endless.

Thank you to Baking Glory.  You can find the original recipe here.

Happy baking!


Cinnamon Bread

The last 7 months have been quite the wild ride for me, thus the lack of posts since July 2013.  So here's to trying to get back into blogging about the recipes I try.  I found this recipe awhile back and this past week was the perfect time for it.  I usually make something to take to staff meetings at work, but time wasn't on my side the night before the meeting, so I whipped it up and took something in on Friday.  This is such an easy recipe and it's great with your morning coffee.

The recipe comes from Redfly Creations.  It's her take on Amish Cinnamon Bread.  This recipe will make 2 loaves, but easy to halve.

Cinnamon Bread


Ingredients for batter
- 1 c. butter, softened
- 2 c. sugar
- 2 eggs
- 2 cups of buttermilk (recipe below)
- 4 cups of flour
- 2 tsp of baking soda

Ingredients for cinnamon mixture
- 2/3 c. sugar
- 2 tsp of cinnamon

What to mix
1. cream together butter, sugar and eggs
2. add milk, flour, baking soda
3. pour half of the batter into 2 greased loaf pans
4. in separate bowl, stir together sugar and cinnamon
5. sprinkle 3/4 the cinnamon sugar mixture on the batter in the pans
6. pour on remaining half of batter
7. sprinkle remaining cinnamon sugar mixture on top of the batter
8. swirl with a knife
9. bake at 350 for 45-50 minutes (or until toothpick comes out clean)
10. let cool in pan for 20 minutes before removing

It's just that easy.  Redfly also mentions that you can make this in muffin tins for individual portions that are easier for freezing and reheating.

Don't have buttermilk, here's what you do.  Measure out needed amount of milk, add 1 tbsp of vinegar or lemon juice for every cup, let sit, stir, and add to recipe.

My tips:
* swirl the first layer of cinnamon sugar mixture into the first half of the batter
* I think I ended up baking my 2 loafs for closer to 60 minutes, but each oven is different, so use the toothpick method to be sure

I got recipe from over here, special thanks to Redfly Creations.

Happy baking!


An Egg-free/Dairy-free Happy Birthday

When my co-worker asked me to make a smash cake for her son's first birthday, I really didn't know what I was in for.  She asked me months in advance and I started looking for ideas on what she was wanting.  Then the call came.  About 3 weeks before the party, I get a phone call.  "Hi....so...how hard would it be to make a cake that is egg-free and dairy-free...?" Um.....yeah.  Not what I was expecting, but I'm pretty good at Google-ing and pretty handy with Pinterest, so I knew how to search for a recipe.  So after a quick search, I soon discovered I had already pinned a recipe that was both egg-free and dairy-free....I must have known I was going to need it at some point.  (Oh...and this recipe is also butter-free!)

And what's a birthday without a cake...not to mention a 1st birthday?!  My co-worker's son had recently been tested for allergies and was even given an Epi-pen for the egg and dairy allergies.  So now, this cake was going to be even more special.  It was not only going to be his first cake, but the only cake he might ever be able to eat!

The cake is called Crazy/Wacky Cake or Depression Cake...what would be really depressing would be life without cake.  This cake was created back in the Great Depression when eggs, milk, and sugar were scarce or too expensive.  I tried this cake before I finished decorating it for the birthday boy and as a "I'll take extra eggs, dairy, and butter in my cake" kind of girl, I could tell there was something different about this cake.  But...if I had gone to a party and was served a slice of this cake with frosting on it, not knowing that it was missing some key cake-making ingredients, I might not have been able to tell a difference.

Birthday boy's mom reported that he loved his cake...mission accomplished!

Now...you may be asking yourself...if he is dairy-free, how did you make the buttercream icing?  Buttercream by its name is made with butter and butter is most certainly not dairy-free.  And even though you can find margarine that is dairy free or close to it - margarine doesn't work well when making buttercream.  Over the last several years, shortening has gone through a transformation in attempts to make it healthier.  Turns out when you change shortening, you now need to find another fat to make really good buttercream and really good pie crust.  An alternative was needed.  Welcome, sweetex.  A little info on sweetex can be found here.  Sweetex is what I've used to make buttercream for the last couple of wedding cakes I've made.  The icing turns out bright white, has a great consistency, and tastes great.

The site where I found this recipe also stated that other's have made this recipe with gluten-free flour mixes and it turns out great.  Sweet Little Bluebird also posted other recipes for other flavors of Crazy/Wacky Cake on her site.  Special thank you to Sweet Little Bluebird for all of these great allergy-friendly recipes.

Crazy/Wacky Cake - Chocolate
Crazy/Wacky Cake - Vanilla and Spiced
Crazy/Wacky Cake - Lemon
Crazy/Wacky Cake - Coffee & Kahlua
Crazy/Wacky Cake - In a Mug

Now those of you who have egg and dairy allergies can have your cake and eat it too!

Happy birthday and happy baking!


Cake Mix Baked Donuts

I asked for a donuts pan for Christmas...and I got one!!!  I've been looking at various recipes for baked donuts, but wanted one that used something that would be quick and easy...like cake mix.  After a couple of different searches, I came across this recipe.


What you'll need:
   1 box of cake mix
   2 large eggs
   1 stick of melted butter
   1 cup of milk

What to do:
   1. Preheat oven to 350.
   2. Mix everything together.
   3. Pour batter into a gallon sized zip top bag and cut about a 1/2 to 3/4 inch off one the bottom corners.
   4. Squeeze batter into sprayed donut pan.....now this is the tricky part.  The batter is thick and you'll only want to fill the donut sections less than half full (you'll see what I mean when we get to the pictures).
   5. Bake for 13-15 minutes....13 minutes was perfect.

After the donuts are cool, you can frost them if you want, but I'm not a big fan of frosted donuts.  Instead, I added chocolate chips to the batter.


Ok...see how full these sections are....TOO FULL!

And you end up with donut-muffins...

donut bottom, muffin top

Easiest way to fill the sections.

Second attempt turned out less muffin-like.

This is as full as the sections should get.

Hello, little ones!

Click here for the link to find out where I got the recipe.

Happy baking!


Rolls!!!

I came across this recipe and wanted to try it out for this year's Christmas celebration.  The recipe is really simple and the end result is...well, let's just say your house is going to smell amazing (which in my opinion is one of the greatest rewards to baking).

Maybe this picture will convince you to make them....

I'll just link the recipe here, from Food.com.

Happy baking!


A Birthday Treat

My parents don't ask for anything for their birthdays and since they are only a day apart and around Thanksgiving, gift buying usually gets overlooked.  So the last couple of years I've just added ingredients for a sweet treat to give them to my Thanksgiving shopping list.  Last year they got some of the toffee peanuts that you can find here.  This year it was sugared pecans and they were a hit.  They were fighting over the jar on Thanksgiving morning!

It's an even easier recipe than the toffee peanuts!

What you'll need:
   1 egg white
   1 Tbsp water
   1 lb pecan halves
   1 c white sugar
   3/4 tsp salt
   1/2 tsp ground cinnamon (I actually added more cinnamon)

What you'll do:
   1. Preheat oven to 250.  Grease one baking sheet.
   2. Mix together egg white and water together until frothy.  In a separate bowl, mix together sugar, salt, and cinnamon.
   3. Add pecans to egg whites and stir to coat.  Then toss pecans in the sugar mixture and stir until coated.  Spread out pecans on the greased baking sheet.
   4. Bake for 1 hour, stirring every 15 minutes.

I warn you now that you're house will smell amazing!

This would make a great gift this holiday season, just pour cooled pecans into a pretty little jar that has an air tight seal.

Special thanks to allrecipes.com for this little treat.

Happy baking!


New School Puppy Chow

Puppy Chow is a treat that reminds me of two people.  The first I've known for more than 20 years.  She would always make puppy chow for church and youth functions, usually because we always requested it.  The second was my first and last college roommate.  We once trekked to the grocery store in more than a foot of snow, and by trekked I mean, on foot - there were no way our cars were getting out of the parking lot, for ingredients to make puppy chow and ugly dip.  It was AWESOME!!!

Did you know that you could use cake mix to make AMAZING tasting puppy chow?!  I didn't, until I found Pinterest.

I decided to make some Cake Batter Puppy Chow for tomorrow's staff meeting.  And of course, I had to make sure it was good enough for them and...I might actually like it more than regular puppy chow.

Here's what I used:
   1 box of rice chex cereal
   1 box of yellow cake mix
   3/4 c powdered sugar
   3/4 bottle of sprinkles
   9 cubes of white almond bark
   2 tsp vegetable shortening
   paper grocery sack

What I did:
Dumped the whole box of cereal in the paper sack.  Poured cake mix and powdered sugar in bowl.  Used a whisk to mix the two together.  Then added sprinkles and mixed again.  Placed the almond bark in a microwave safe container and then melted in microwave in 30 second intervals, stirring after each interval.  About half way through the melting process, I stirred in the shortening - this will thin out the chocolate mixture, making it easy to coat the cereal.  After chocolate was completely melted and shortening was well incorporated, I dumped it on top of the cereal and gave the bag a good shaking.  If the cereal isn't well coated, use a rubber scrapper to stir the cereal and chocolate until well coated.  Once it was well coated, I poured in the cake mix-ture, closed bag and gave it another good shake. After the cereal was coated with the cake mix-ture, I dumped it all out on wax paper I had laid out on the table to dry before putting in an air-tight storage container.

I may regret ever trying this recipe...it is really, really good!

I've seen several versions of this recipe on Pinterest, but the one I used for a base came from Six Sisters' Stuff.  Click here for the link to their recipe.

Happy cooking!


New Family Favorite

I found this recipe on no other than Pinterest and never thought it would have gotten the reviews from my family that it did.  I was totally blown away...I mean, Paul was the first one to say how good it was and went back for seconds (which he doesn't do very often).  AND...this recipe is so ridiculously easy.

Here's what you need:
   4 chicken breasts
   1 pkt of Italian dressing seasoning
   1 - 8oz block of cream cheese (softened)
   2 cans of cream of chicken soup
   milk
   1 box of rotini or penne pasta

Here's what I did:
The night before, I cooked the four chicken breasts on the stove in a covered skillet.  After they were fully cooked, I threw them in my mixer and let it do the shredding (another helpful trick I learned from the many hours of research I've done on Pinterest).  I then let the shredded chicken cool and before going to bed, covered it and put it in the fridge to hang out overnight.

**Update (12/2/12) - I used the beater attachment on my KitchenAid Mixer.  When using this trick to shred chicken, it's a good idea to place a towel over the mixer to keep the chicken in the mixing bowl.

The next morning, I set out the cream cheese to soften while I got ready for church.  Before leaving for church, I got out the crock pot and dumped in all ingredients except for the milk and turned it to low and let it do it's thing while we were at church (recipe said cook on low for 4 hours).  When we got home from church, I put on a pot of water to cook the pasta.  While the pasta is cooking, stir the Italian chicken mixture...this is where you might need to add some milk to the mixture to thin it out a bit.  After the pasta is cooked, drain and then dump in a large bowl (I mean, LARGE, you're going to need a large one for all the pasta and chicken mixture) and add the chicken mixture and stir everything together.  OR you can do what I made my family do...mix it together on their own plates!

I didn't have any pictures of this delicious meal, but my family loved it especially with salad and homemade garlic bread.

I want to credit someone for this recipe, but the pin I found with this recipe doesn't actually link you to the recipe you see here...so, whoever you are, thanks for a great and easy recipe that is Karrick family approved!!!

Happy cooking!


Easy Cupcakes/Muffins revisited

We are finally starting to feel a cool down in the weather, which I love...because I LOVE FALL!  And when I think of fall, I to wear jeans and long sleeve shirts and get out my fleece.  And when I start to dress like fall is in the air, I want to start enjoying some of the great tastes of fall like soup and persimmon cookies.

I made these super easy cupcakes/muffins last fall and when I felt the chill in the air this past week, the  hunger for them started.  I say cupcakes/muffins because I'm not really sure which they are...they would be good with a nice cream cheese frosting, but they are more dense like a muffin.  I wanted to add some additional ingredients this time to "fall" them up.


Main Ingredients:
   white or yellow cake mix
   can of pumpkin
   milk

Additions:
   pumpkin pie spice
   cinnamon
   raisins

Review of what to do:
   1. Mix cake mix and pumpkin together with mixer.  Add a little milk to mixture.  (You want the mixture to look like a mousse.  I think I added between 1/4 and 1/2 cup of milk.)
   ***Now add the additional spices.  I didn't measure the spices, I just sprinkled some in and then tasted the batter until I got the flavor I wanted.  Then mixed in the raisins (about half of the 15oz box I had.)
   2. This recipe makes 24 regular sized cupcakes.  I didn't spray the cupcake papers (if you "have" to eat one as soon as it comes out of the oven, the bottom will stick to the paper, but have no shame when you eat the cupcake/muffin off the paper like a little kid!  Have no fear though, after the cupcakes have cooled and sat for a couple of hours they will easily peel away from the paper.)  When filing my cupcake pan, I use an ice cream scoop...the easiest way to fill cupcakes EVER!  And yes, the  one scoop will look like too much, but this batter doesn't rise that much - one scoop is perfect!
   3. Bake for 20 minutes....the cake mix said 20-25 minutes, at 20 minutes I checked them with a toothpick and they were done.

I don't feel the need to frost these, but if you need a little something extra on this pretty little fall treat, then by all means frost away!

I am looking forward to trying some new fall recipes this year and will be sure to post the pros and cons of the tested recipes.

Happy baking!


Rollin'

It's safe to say that my family loves pasta.  We have pasta at least once a week and I have leftovers for lunch...that's how much I love pasta.  One of my husband's favorite pasta dishes is stuffed shells.  I've mentioned the stuffed shells recipe before and I have it thanks to a dear friend of mine who now lives on the west coast and I miss her terribly :(

There are tons of recipes for the pasta stuffing out there and you may have a favorite that you use, so I'm not going to share my recipe with you (it's now become a secret family recipe!).  I've seen several meal ideas for lasagna rolls which are supposed to make the idea of lasagna a little less overwhelming due to the small amount of work involved in the process.

Get rollin'...what you'll need
 - lasagna noodles
 - ingredients for pasta stuffing
 - pasta sauce


Get rollin'...what you do
1. Prep your pasta stuffing.  I mixed mine up and then let it chill in the fridge until the pasta was ready.
2. Preheat oven to 400 degrees.
3. Cook lasagna noodles.  I cooked mine just long enough to be able to roll them.  You'll want them just over al dente because you're going to bake them once they're rolled.  Drain them and rinse them with cold water.  (Rinsing goes against all great pasta recipes, and normally I don't rinse my pasta, but if you want to be able to handle the noodles to make the rolls, you'll need to cool them down, which is the only purpose for the cold water rinse.)
4. Prep your rollin' station...cooled lasagna noodles, pasta sauce, stuffing mixture, paper towels, baking dish.  (See above picture)
5. Pour enough sauce to just cover the bottom of the baking dish.
6. Lay out your paper towels and pat both sides of the noodles dry.  They will still be sticky, but you don't want them soaking wet or the stuffing mixture won't stick.
7. Spread a small amount of the stuffing mixture on the noodle and then start rollin' em up!  Lay them with them seam down in the sauce.  Continue the drying, spreading, and rollin' until you've used all the noodles and stuffing mixture.
8. Bake for 20-30 minutes.  Sprinkle on some mozzarella the last 5 minutes for some added cheesiness!


Don't they look yummy?!

Happy cooking!


Easy Cinnamon Rolls

Growing up with a bakery in your back yard meant that you were never in short supply of cinnamon rolls.  And they were probably one of my favorite thing we made.  I remember rolling out the large ball of dough, covering it in softened butter, and then working in the brown sugar and cinnamon.  Every part of making them was an art...and the best of this art is that you could enjoy it warm out of the oven slathered with sweet icing.

The recipe I'm going to share in this post, isn't the recipe for those cinnamon rolls, but for some simple ones that can be rolled out and enjoyed even on a hectic Sunday morning.

Easy Cinnamon Rolls
   2 tubes of crescent rolls
   spreadable butter
   brown sugar
   cinnamon
   powdered sugar
   milk
   vanilla

   1. Preheat oven according to crescent rolls directions.
   2. Lay out crescent roll sections and spread on butter with a knife.
   3. Add brown sugar, just enough to cover the whole triangle.
   4. Sprinkle on some cinnamon.
   5. Then roll the crescents from large edge to small edge and lay on baking sheet.
   6. Bake according to crescent roll directions.
   7. In a bowl combine a little bit of milk, a couple of tablespoons of powdered sugar and a couple of drops of vanilla and stir together to desired consistency.  When rolls come out of the oven, let cool for a couple of minutes and then drizzle on the icing.

   Last, but certainly not least, enjoy!


Happy baking!


Easy Weeknight Dinners

So, I realize I haven't been posting as much as when I first started this blog, but life gets crazy and hopefully it will all start to slow down in the next couple of weeks.

I wanted to share a couple of recipes with you that I have tried and are quite tasty!  I can't say that I've made both of them....my husband actually made the Easy Chicken Bake for us on a night when I didn't get off work until late.  I can tell you that if you make the Easy Chicken Bake and there is some left, the leftovers make a great lunch the next day!

The first recipe I made a few years back, but recently came across it again a couple of weeks ago and will be making it again soon.  Chicken and Broccoli Alfredo is an easy pasta dish that includes a vegetable!  Click here to go to the recipe site!

The second recipe is the one my husband made last week.  This recipe uses ingredients you are most likely to have in your pantry and freezer already!  Easy Chicken Bake is another one dish meal that includes the vegetables and doesn't necessarily need a side!  Click here to go to the recipe site!

Happy cooking!


Brownies + Cheesecake + Snickers = Out of this WORLD!!!

Hello, bake sale goodness!!  I found this recipe on Pinterest and knew I had to give it a try...I mean, why not?  How could this recipe go wrong?!  As I've said before...I don't always follow recipes and this is one of those.  The original recipe calls for homemade brownies, which I'm sure are really good, but I was looking for easy...so, I just picked up a box of my favorite box mix.


Snickers Cheesecake Brownies

Brownie Layer: favorite from scratch recipe or box mix and ingredients needed to make brownies

Cheesecake Layer:
   1 egg
   1 Tbsp vanilla extract
   8 oz cream cheese, softened
   1/2 c confectioners sugar
   1 bag of fun size Snickers, chopped

1. Make brownies and bake according to directions.
2. While brownies are baking, mix up ingredients for the cheesecake layer minus the Snickers.  And then begin chopping all of the Snickers.
3. After brownies are removed from the oven, pour on the cheesecake layer and spread it evenly over the brownies.  Return brownies to the oven for another 10 minutes (my cheesecake layer started to brown on the edges).
4. Remove brownies from the oven and let cool for only a couple of minutes before evenly sprinkling all the chopped Snickers pieces over the brownies....then comes the hard part - let them cool before cutting.

Paul took these to a bake sale at his office and they went fast!

Click here for the link to the location of the original recipe...thanks, Bakers Royale!


Happy baking!


BBQ Cheeseburger Pie

The first time I served the Impossibly Easy Cheeseburger Pie (from the Bisquick box) they were ready to request it again.  This is my spin on the already approved recipe.  Once you've tried this recipe, you'll be able to come up with some yummy creations that will suit your family's tastes!

What you'll need:
   1 lb ground beef
   1/2 c or more shredded cheese
   1 box of cornbread mix
   ingredients to make corn bread (for Jiffy: 1/3 c milk and 1 egg)
   

Preheat oven to 400.
Brown a pound of ground beef and drain off grease.
Place beef in baking dish and stir in your favorite bbq sauce...make sure that all the beef is coated with sauce.
Evenly distribute beef in dish and top with shredded cheese (I used cheddar, but you could use whatever kind you like best or have in the fridge).
Whip up a box of cornbread (I usually have Jiffy on hand).
Pour cornbread mixture over cheese and gently spread cornbread to completely cover cheese and beef.
Bake for 20 minutes.
Enjoy!!!


Happy baking!


Easy Monkey Bread

Any recipe that can be created, made and posted all in one Sunday morning meets the criteria of being quick and easy.  I could have easily adapted some other recipes for my one can of biscuits, but that's not as much of a challenge.

You'll need to preheat oven to 350 and while that's warming up,
tear pieces of the biscuits to make 1 inch balls...


In a small bowl, melt butter, then add sugar, brown sugar, and cinnamon with a whisk.  Because I only had 1 can of biscuits, I used my bread loaf pan and sprayed it with cooking spray.  In the picture, you can see that I poured some of the sugary mixture into the greased pan as a base for the dough balls that would go in the pan first.

Than add all dough balls to pan and pour on the remaining sugary mixture, coating evenly.


Bake for 35 minutes.

Then comes the magic!


Place plate over pan and flip!


Yummy!

Watch your fingers when reaching for a piece, this stuff goes fast!


Easy Monkey Bread
   1 can of biscuits (buttermilk kind)
   1/2 stick butter, melted
   4 Tbsp sugar
   5 Tbsp brown sugar
   1 tsp cinnamon (I just sprinkled some in...didn't actually measure)


Happy baking!


2 Minute Chocolate Cake

Does your sweet tooth ever drive you crazy?!  You might be reading this post because you didn't believe the title...chocolate cake in 2 minutes?  NO WAY!!!  Well...way!

I had this saved on my Pinterest, but forgot about it until tonight.  A quick check of the recipe to make sure I had all the ingredients (cause no one wants to get their hopes up when it comes to chocolate) and I was headed to the kitchen.

This recipe is also the kind you can mix up in one bowl.  Just start with the egg and beat it lightly and then add the remaining ingredients and whisk together.


Then pour into your coffee mug.  The blog said you could use a regular sized mug, but mine is taller than most and when "baking" in the microwave, it raised up over the mug and could have potentially baked over a regular sized mug.


Ta-da!

 Salted Caramel Mug Cake
   4 Tbsp all purpose flour
   4 Tbsp sugar
   3 Tbsp unsweetened cocoa powder
   1/4 tsp baking powder
   1/4 tsp salt
   1 egg, beaten
   3 Tbsp skim milk
   1 Tbsp vegetable oil
   2 salted caramels

   1. Into a small bowl add all ingredients except caramels and mix to combine.
   2. Pour mixture into a regular sized coffee mug.  Drop caramels into center of mixture one at a time.
   3. Microwave on high for 90 seconds.  If needed (if cake batter is still gooey), microwave on high for up to an additional 30 seconds.

Click here to go to the blog where you can find more coffee mug treat recipes!
Thanks to Babble for a quick treat to quite the sweet tooth!

Happy baking!

Healthy Jalapeno Poppers!

I've just recently become a fan of jalapeno poppers, thanks to Buffalo Wild Wings who had a great appetizer this fall.  These little babies are much healthier, which makes them even more amazing!  If you haven't discovered wonton wrappers in the produce section of the grocery store, you're missing out.  These little squares make great little pockets and bake up nicely in muffin tins for little cups (I'll be sharing a recipe for this!).  They have the wonton wrappers and then they have the egg roll wrappers (larger squares)..which are good for making chimichangas (I'll get to that recipe later too!).  I got mine from Walmart, they're by the salad mixes and salsas in the produce chiller.  This is another little treat you're going to want to take to parties...everyone will love them!


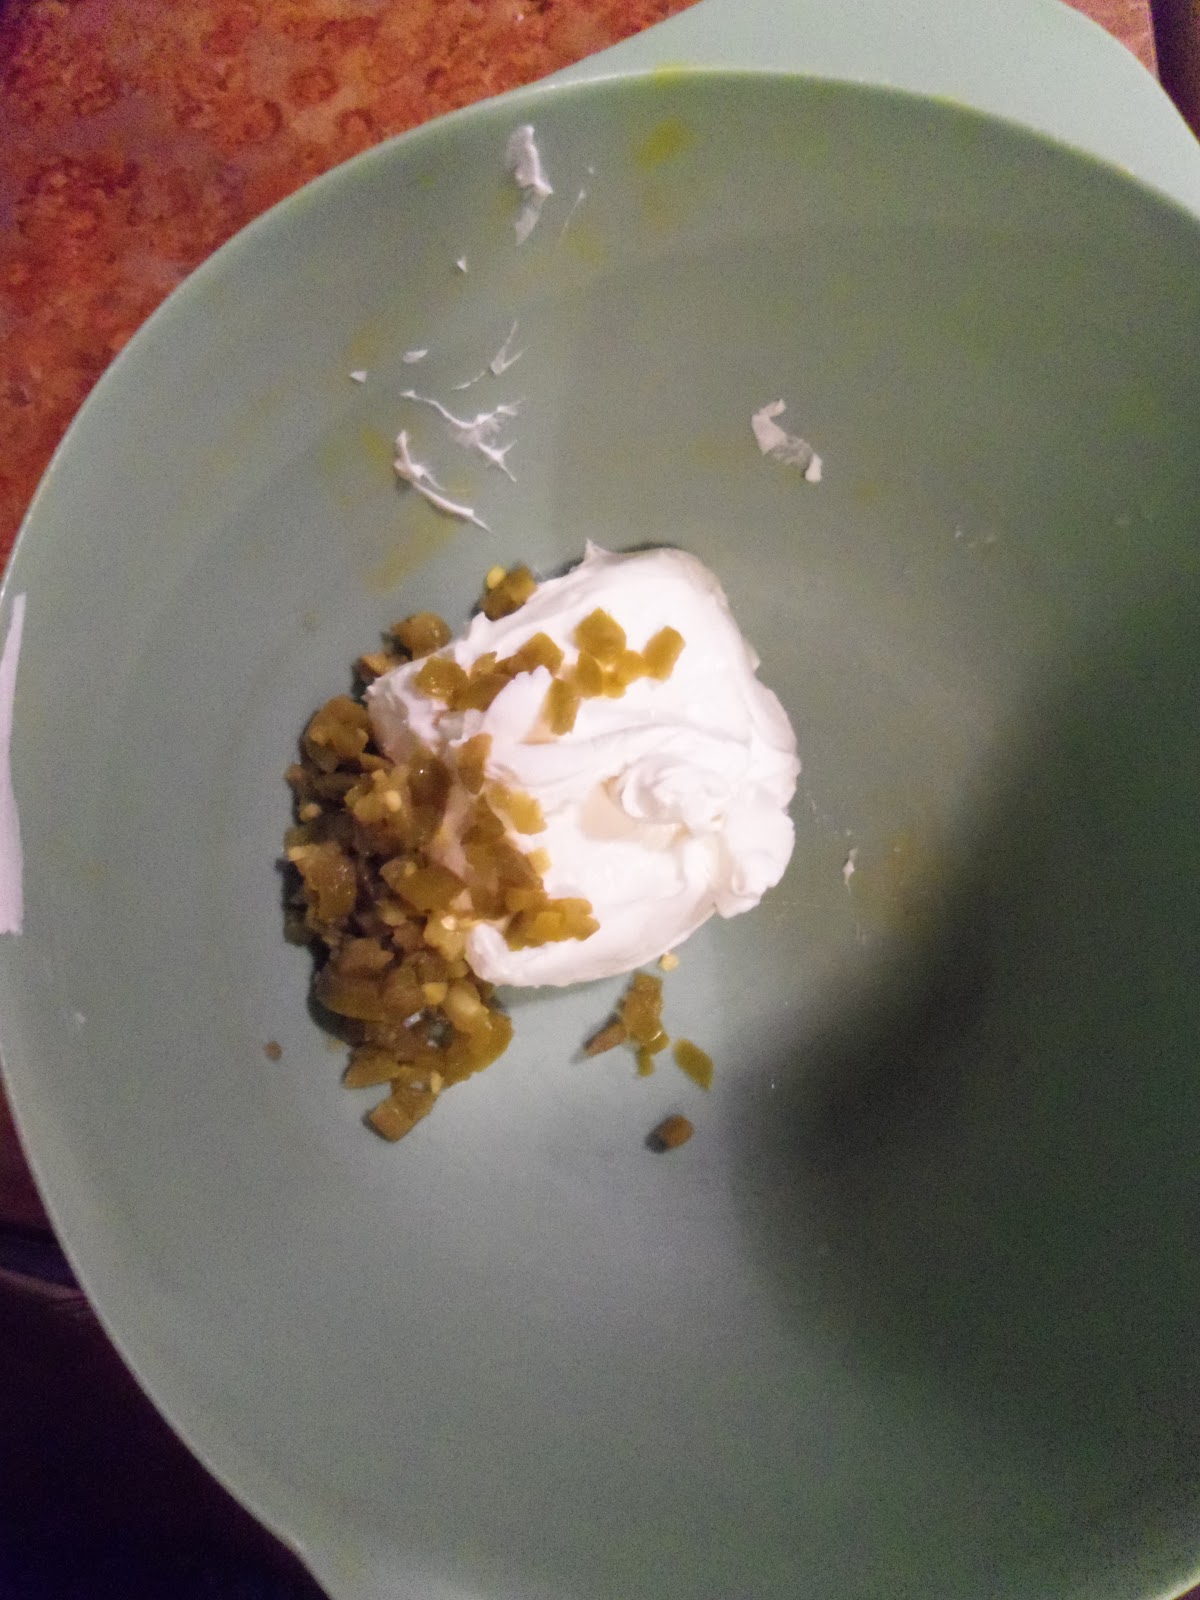
 First you'll need to soften cream cheese by letting it come to room temperature.  When that's ready you can then dice some jalapenos.  I just bought a jar of jalapeno slices and diced them up, but if you make this in the summer you could use some fresh jalapenos.


Then sprinkle in some bacon pieces (everything's better with bacon, right?!) and shredded cheddar cheese.  Mixing time, since the cream cheese is soft, you can just use a spatula.  If after mixing, you notice you don't see a speck of each thing added to the cream cheese, then add some more!


Here's your popper filling!  Ok, so I kind of had both hands busy while putting these little things together, so I didn't get a picture of the wonton filling process, oops!  But it's super simple.  I used a regular spoon and got a scoop of the mixture that was about half of the spoon, then dolloped it in the middle of the wonton square.  (Have a cup of water near by so you can easily seal the wonton and move on to the next.)  Dip you're finger in water and get two of the edges, connected by a corner, wet.  Then fold the opposite corner over and press edges together, making a little triangle.  After you've used all your filling, place poppers on a sprayed cookie sheet.  To get a crisp, golden brown top, give a quite spray of cooking spray to the tops of the poppers.


Heat oven to 375 and bake for 15 minutes.


I served mine with sweet and sour sauce that you can get in the Asian food section at Walmart.
Since their baked and not fried, you can enjoy a few more with out all the grease!  I bet you can't eat just one!

Jalapeno Poppers
   16 Wonton wrappers
   4 oz cream cheese, softened (I used the reduced fat kind)
   1 1/2 Tbsp jalapenos, finely chopped (I didn't use an exact measurement)
   1 Tbsp bacon bits (again, I didn't use a measurement, just sprinkled some in)
   1/4 c shredded cheese (approximate)

   Sweet and Sour sauce


1.  Preheat oven to 375.  Spray cookie sheet with cooking spray.
2.  Mix cream cheese, jalapenos, cheese and bacon together.
3.  Place Tbsp of mixture in wonton wrapper.  Dip fingertip in water and wet 2 edges of the wrapper, fold over to form a triangle and press to seal.
4.  Spray lightly with cooking spray for crispy golden brown.
5.  Bake for 15 minutes.
6.  Serve with sweet and sour sauce and ENJOY!!!


Thanks to Pinching Your Pennies for this delicious little snack!  The recipe you'll find on the linked site is a smaller portion than mine, but I was making mine for a party.

Happy baking!


Cookie Dough Dip

Like we need more sweets this time of year...but I think you're going to want to make this one for your holiday parties.

I didn't take pictures of this process or even the end result.  I also didn't follow the recipe because I was trying to remove some of the calories from this creamy dip.  I'm guessing the substitution I made is why mine turned out a little gooey, but that's okay, the girls enjoyed it as a snack today.

Cookie Dough Dip
   1 - 8oz pkg cream cheese, softened
   1/2 c butter, softened
   1 c powdered sugar
   2 Tbsp brown sugar
   1 1/2 tsp vanilla
   1 c chocolate chips
   1 c toffee bits

1. Cream together cream cheese and butter.
2. Add remaining ingredients and mix until well combined.
3. Serve with graham crackers, chocolate graham crackers, animal crackers or the healthy choice - apples!

Thanks to Add a Pinch for the recipe!

Happy cooking!