My parents don't ask for anything for their birthdays and since they are only a day apart and around Thanksgiving, gift buying usually gets overlooked. So the last couple of years I've just added ingredients for a sweet treat to give them to my Thanksgiving shopping list. Last year they got some of the toffee peanuts that you can find here. This year it was sugared pecans and they were a hit. They were fighting over the jar on Thanksgiving morning!
It's an even easier recipe than the toffee peanuts!
What you'll need:
1 egg white
1 Tbsp water
1 lb pecan halves
1 c white sugar
3/4 tsp salt
1/2 tsp ground cinnamon (I actually added more cinnamon)
What you'll do:
1. Preheat oven to 250. Grease one baking sheet.
2. Mix together egg white and water together until frothy. In a separate bowl, mix together sugar, salt, and cinnamon.
3. Add pecans to egg whites and stir to coat. Then toss pecans in the sugar mixture and stir until coated. Spread out pecans on the greased baking sheet.
4. Bake for 1 hour, stirring every 15 minutes.
I warn you now that you're house will smell amazing!
This would make a great gift this holiday season, just pour cooled pecans into a pretty little jar that has an air tight seal.
Special thanks to allrecipes.com for this little treat.
Happy baking!
Showing posts with label simple gifts. Show all posts
Showing posts with label simple gifts. Show all posts


SUGAR!
Earlier this year I was diagnosed as a pre-dabetic (insulin resistant)...and have had to adjust my choices in foods. I'm a carbs girl...I love breads and sweets, I would say it's in my genes. It might also have something to do with the family bakery that we had when I was growing up. It's not that I can't have sugar, but I do have to watch my carb intake...which can be a sad day when I just want another piece of dessert. This post has nothing to do with something you can eat, but rather something that's a little more friendly to the hips and tired hands after a long day. This post may not involve baking or cooking, but it was made in my kitchen and after you try it, you'll be hooked!

When doing one of my many searches on Pinterest, I came across a great use for sugar that doesn't involve putting it in food...hand scrubs! When we were on vacation this last summer, we had lunch at a restaurant who had put some hand scrub in their women's restroom. One of my step-daughters and I gave it a little try when washing our hands and that's when it happened...love <3 Since then, I've thought about that scrub and wondered if I'd ever find anything like it again AND I have!!!
I found 4 basic hand scrubs that took a lot of the same ingredients and most of them natural and things you can probably find in your pantry right now.
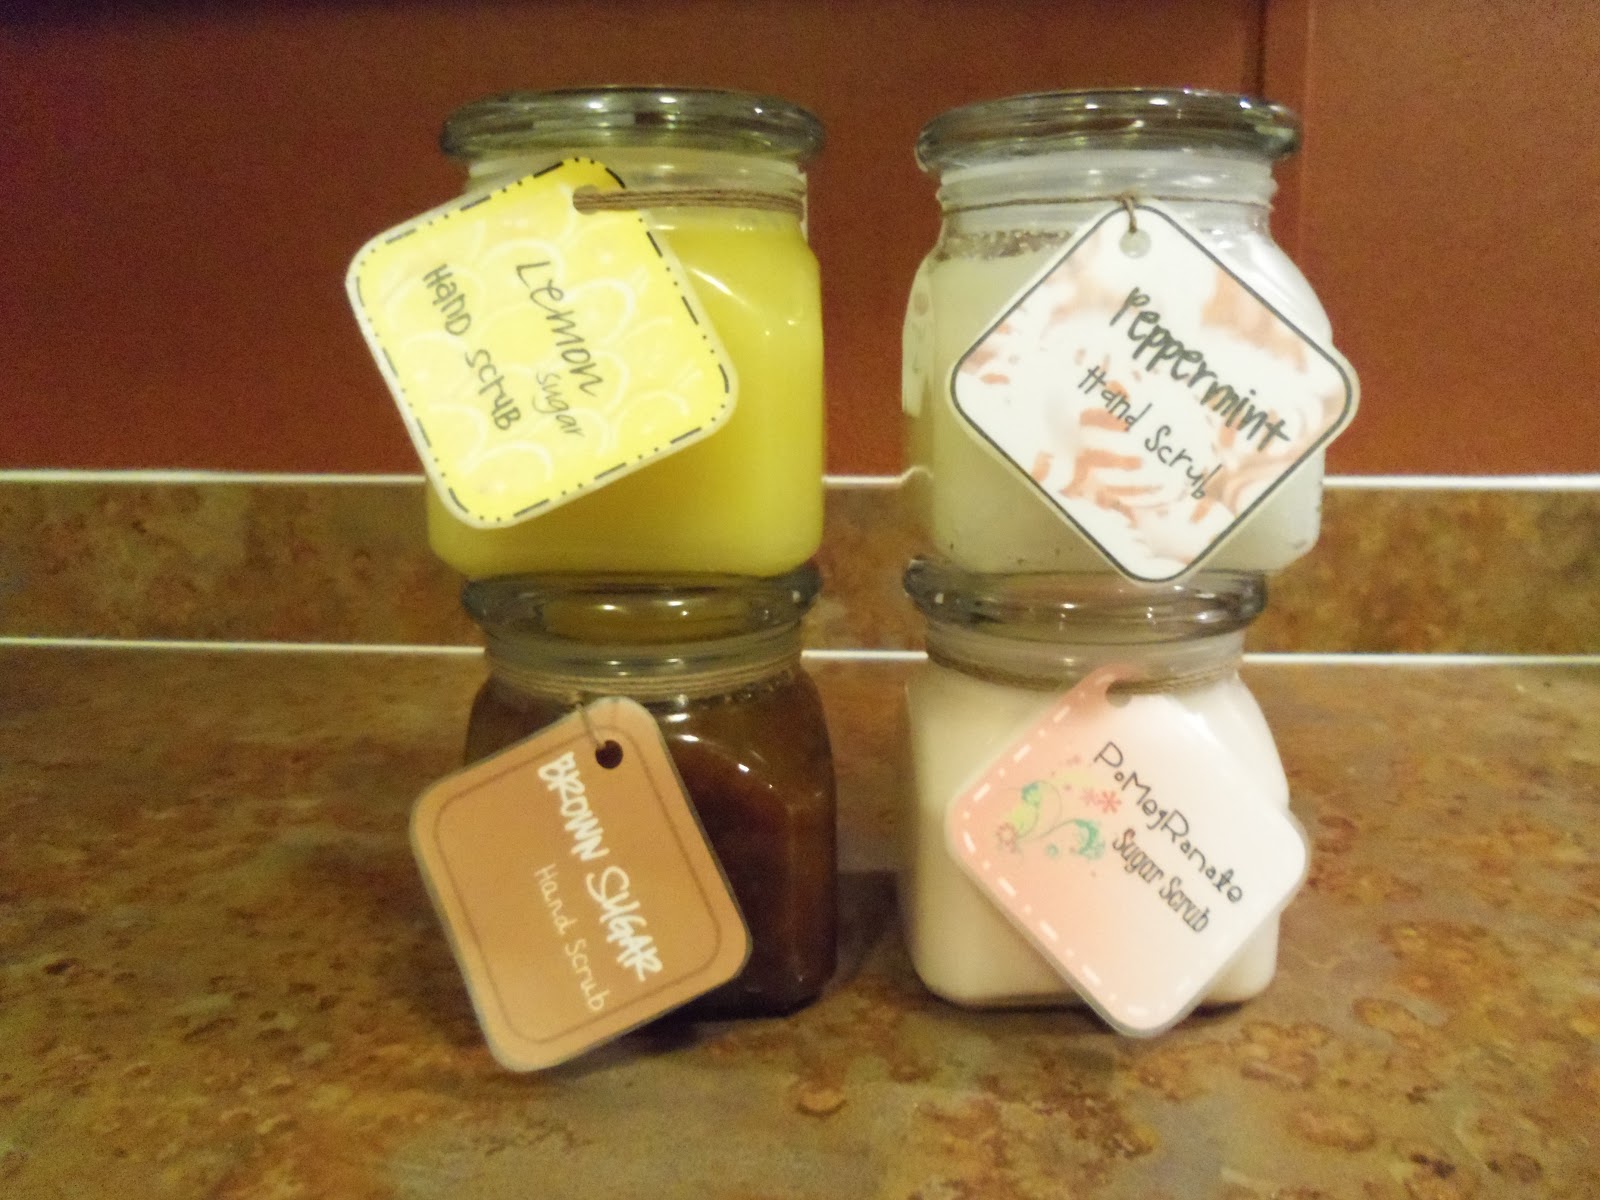
brown sugar sugar
extra virgin olive oil extra virgin olive oil
honey lemon extract
yellow food coloring
sugar sugar
hypoallergenic baby oil Dawn with Olay Beauty Hand Renewal
corn syrup (pomegranate splash scent)
peppermint extract
To find the recipes, click on the title of the scrub.
My step-daughters were good sports to stir, smell, and test the scrubs as they were being made. These scrubs would make great gifts this holiday season. I got my jars from Walmart for $2. The dollar store had some for $1, but they were larger and had screw top lids (that wasn't quite what I was looking for, so for me the Walmart ones worked best).
I didn't follow the recipes exactly (go figure). I filled the jar with sugar and then dumped it in a bowl to add the remaining ingredients. Once everything was stirred and added to the jar, we had to make a little more of each to top off the jars.
Sugar isn't just for your desserts anymore, it's for that rough, dry skin that needs a good polishing. A special thanks to The Idea Room, By Stephanie Lynn, and Homemade Mamas for some excellent ideas!
Happy...scrubbing!
A Sweet and Crunchy Treat...Toffee Peanuts
This Christmas I want to give as many homemade gifts as possible. In search of some easy DIY treats, I came across these little nuggets of sweet delight on Pinterest. (I tend to lose track of time when I start "liking" and "pinning" things!) Anyway, I wanted to do a test run on these before making a jumbo batch for gifts. Since today is a holiday and I had the day off, I got to play in my kitchen!


See this picture? This is where I went wrong. Remember when I said that you needed to "get out a baking sheet (spray it with a moderate to heavy amount of cooking spray)"...well this is why. I thought it might be easier to just use wax paper and spray it with cooking spray before pouring on the little nuggets...WRONG! Once cooled, the sugary mixture fused itself to the wax paper making it nearly impossible to get off. SO...just use the baking sheet and quite a bit of cooking spray. (What was supposed to save time only added time and a little bit of frustration to this very simple recipe.)

Happy baking!
Editor's Note...12.16.11
It's really a simple recipe to follow. I ended up taking some pictures just to make the post have a little more to it.

There are only 5 ingredients in this recipe...you might even have 4 of them in your pantry right now. Just preheat the oven, get out a baking sheet (spray it with a moderate to heavy amount of cooking spray) and you're ready.

Mix the first 4 ingredient together with a whisk. Add peanuts and use a spatula to stir, coating the peanuts with the liquid gold!


See this picture? This is where I went wrong. Remember when I said that you needed to "get out a baking sheet (spray it with a moderate to heavy amount of cooking spray)"...well this is why. I thought it might be easier to just use wax paper and spray it with cooking spray before pouring on the little nuggets...WRONG! Once cooled, the sugary mixture fused itself to the wax paper making it nearly impossible to get off. SO...just use the baking sheet and quite a bit of cooking spray. (What was supposed to save time only added time and a little bit of frustration to this very simple recipe.)
After you take them out of the oven, leave them on the baking sheet to cool. I'd recommend stirring them about 8-10 minutes into their cooling...this will help them cool faster and allow you to start breaking them apart with your stirring utensil. Once cool, you'll need to try them :) and why not?! I poured everything in to one of my mixing bowls and used my stirring utensil to sort of hack at the peanuts, breaking them apart. (This is just the method I chose to use.) Then spoon them into the air tight container you're going to be storing them in. I picked up some air tight jars at the dollar store for $1 (since mine are going to be gifts) and then added a bit of ribbon to amp up the festiveness of this little treat.

Aren't they cute?!
Toffee Peanuts
1/4 c. sugar
2 tbsp melted butter
2 tbsp corn syrup
1 1/4 tsp cinnamon
2 c. dry roasted peanuts
1. Mix sugar, butter, syrup and cinnamon.
2. Add peanuts, stir to coat.
3. Place on a greased cookie sheet and bake at 300 degrees for 20-25 min, until golden brown)
4. Cool and break apart.
Click here to go to the site where I found the recipe. Thanks, Cookin' up North!
Editor's Note...12.16.11
After making multiple batches of these little nuggets, I've discovered a few things.
1. The recipe calls for 2 c. of nuts...it should really be 2 1/2 cups. (If you have a lot of the sugar mixture lingering at the bottom of the bowl after adding 2 c. of nuts, add a little more...this is what caused the very sticky, not-so-easy-to-remove-nuts situation.
2. After baking the nuts, I recommeded to stir them about 8-10 minutes into their cooling....NO, stir them as soon as you take them out and then almost continuously until they've cooled enough to not clump together.
I made two pans of them last night and they turned out great with these two edits to the recipe.
Enjoy!
Subscribe to:
Posts (Atom)