Biscuit Quiche

If you love breakfast food and have never had quiche...you're missing out!  Two words - egg. pie!  Now...here's my problem with it - pie crust.  It's not that I hate pie crust...I'm just not a fan of the extra crimped edge.  I whipped up this quick recipe for a Sunday School breakfast recently and there were just enough leftovers for my lunch!


What you'll need:
 - 1 can buttermilk biscuits
 - 1/2 lb breakfast sausage (cooked and drained)
 - 1/2 to 1 c shredded cheese (I prefer cheddar)
 - 6 eggs
 - 1 c heavy cream
 - seasonings (you pick)

What you'll do:
 - Preheat oven to 375. Grease 9x13 baking dish.
 - Brown breakfast sausage and drain.
 - Tear each biscuit into smaller chunks and layer in bottom of baking dish.
 - Whisk together eggs, heavy cream, and seasonings (I used salt, pepper, garlic powder, and minced onions.)
 - Top biscuit pieces with sausage and sprinkle on cheese.
 - Pour egg mixture over biscuit/sausage/cheese.
 - Bake for 30 min.

Happy baking!


pie oh my

Growing up in the kitchen and with a bakery in my backyard, I might know a thing or two about pie.  If you ask my dad what's his favorite kind of pie, he ALWAYS answers, "there's only 2 kinds of pie...hot and cold."

On a recent trip home, my parents took me to this little diner/cafe not far from where I grew up.  We had lunch and because they are known for their pies, (of course) I had to have a slice.  That particular Saturday, they had a Butterfinger pie in the case and I knew it was the one.  It came on a small mismatched plate and piled high with whipped cream.  From the first bite, I knew I was in love.  It was rich and amazing!  I needed to figure out how to replicate this pie for myself.

This pie had 4 layers that added up to it's amazing-ness.  A chocolate cookie crust.  A creamy peanut butter layer.  A butterscotch pudding layer.  And last, but not least, the whipped cream.  I'd say I'm pretty good in the kitchen, so I set out to find the perfect recipe for the peanut butter layer.  I could figure out just from looking at the pie what the other layers were, but the peanut butter was something special.

(Inspiration pie)


This the perfect pie...it's easy, requires no baking, and is full of flavor.  Here's my interpretation of Butterfinger Pie.  This recipe yields a 9x13 pan of Butterfinger amazing-ness!

Ingredients:
   regular size package of Oreo's
   2 small boxes of butterscotch pudding (+ milk to make)
   1 container of whipped topping
   1 - 8oz block of cream cheese (room temp)
   1 c. peanut butter
   1 c. powdered sugar
   3 small Butterfinger candy bars, crushed

What to do:
1. In a medium sized bowl, make butterscotch pudding and let set up in refrigerator.
2. In a large ziploc bag, crush all Oreo's until crumbles.  Then spread an even layer in a 9x13 pan.
3. In a large mixing bowl, cream the block of cream cheese, add powdered sugar and peanut butter and mix until well blended.  Then fold in about 1/3 of the whipped topping.  Dollop on top of the Oreo crumbs and gently spread the peanut butter layer until covering all cookie crumbs.  Cover and let set in refrigerator until pudding is set.
4. Once pudding is set, take it and the 9x13 out of the fridge.  Spread the pudding evenly over the peanut butter layer.  (At this time, your 9x13 is most likely filled to the top.  If serving now, layer on the remaining whipped topping and top with candy bar crumbles.  If serving later, wait to add the whipped topping and candy bar crumbles right before serving.)


I would guess that this would also make 2 - 9in pies (if you're just wanting to buy the Oreo crust already made).  If that's the case, you might want to purchase another whipped topping to make sure you have enough for both pies to be fully covered and looking pretty.

Happy no-baking!


Soft Pretzel Twists

I've wanted to make homemade soft pretzels for awhile now, but couldn't find a recipe that stood out to me.  That is until I came across this one last weekend.  And what better day to whip up some soft pretzels than on Super Bowl Sunday?!

What you need:
 - 1 1/2 c. warm water (100-115*F)
 - 1 Tbsp sugar
 - 2 tsps kosher salt
 - 1 (1/4-oz) pkg active dry yeast
 - 4 1/2 c. all-purpose flour
 - 4 Tbsp unsalted butter, melted
 - Vegetable oil
 - 10 c. water
 - 2/3 c. baking soda
 - 1 large egg yolk beaten with 1 Tbsp water

What you do:
In stand mixer bowl, combine water, sugar, and kosher salt.  Sprinkle yeast on top and allow to sit for 5 min or until it starts to foam.

Attach the dough hook to the mixer and then add the flour and butter to the bowl and mix on low until ingredients are combined.

Increase speed to medium to knead dough until it's smooth and pulls away from the sides of the bowl (4-5 min).

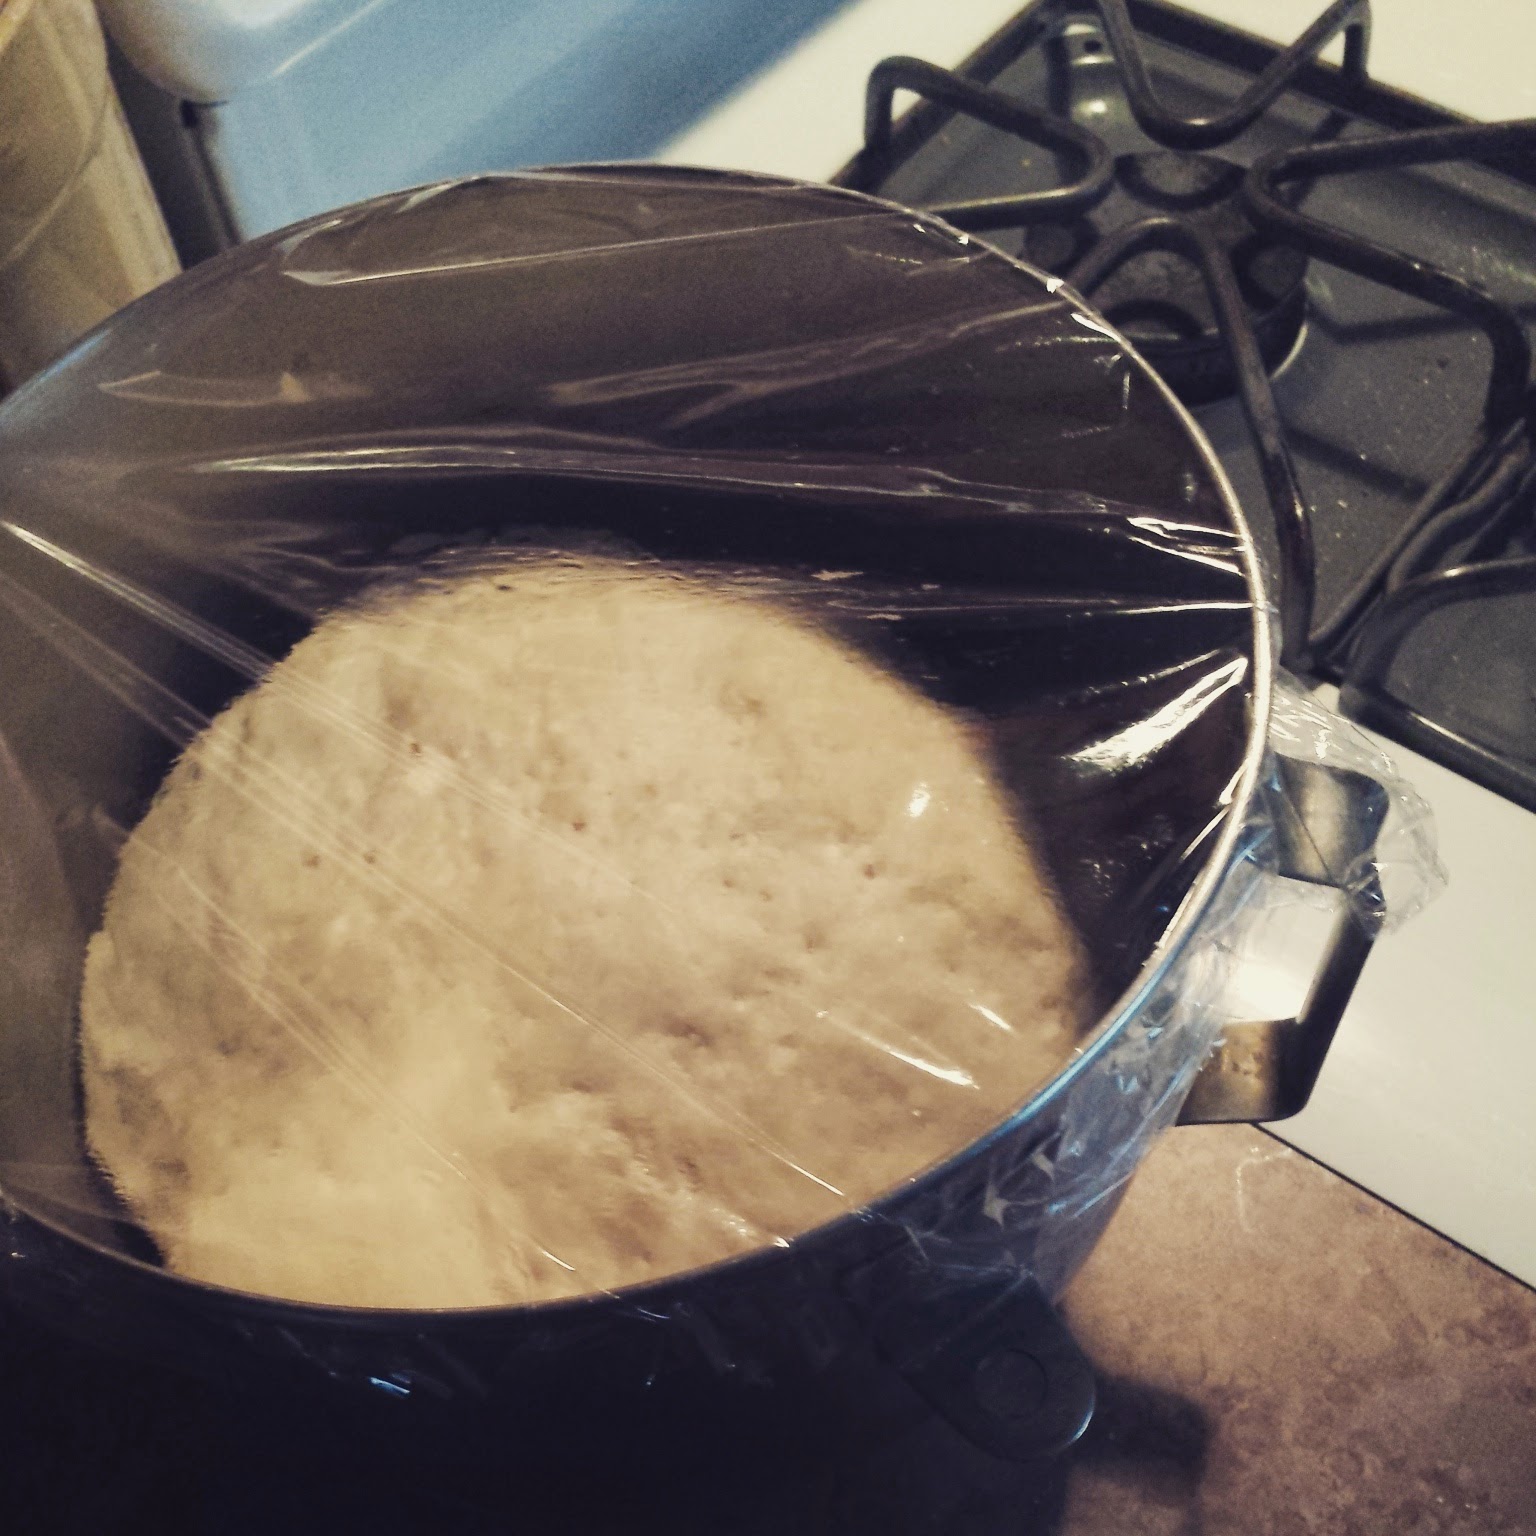
Remove dough from bowl.  Wash and dry bowl and grease it with vegetable oil.  Return the dough to the bowl, covering it with plastic wrap and place it in a warm place for 1 hour, or until the dough as doubled in size.***

Preheat oven to 450 and line two sheet trays with lightly oiled parchment paper (optional - I didn't do this, just used my non-stick Wilton cookie sheets).

Stir together the 10 c. water and baking soda in a large quart pot and bring to boil.

While water is coming to a boil, turn the dough on to the counter and divide into 12 equal pieces.  (Do not flour the counter!)

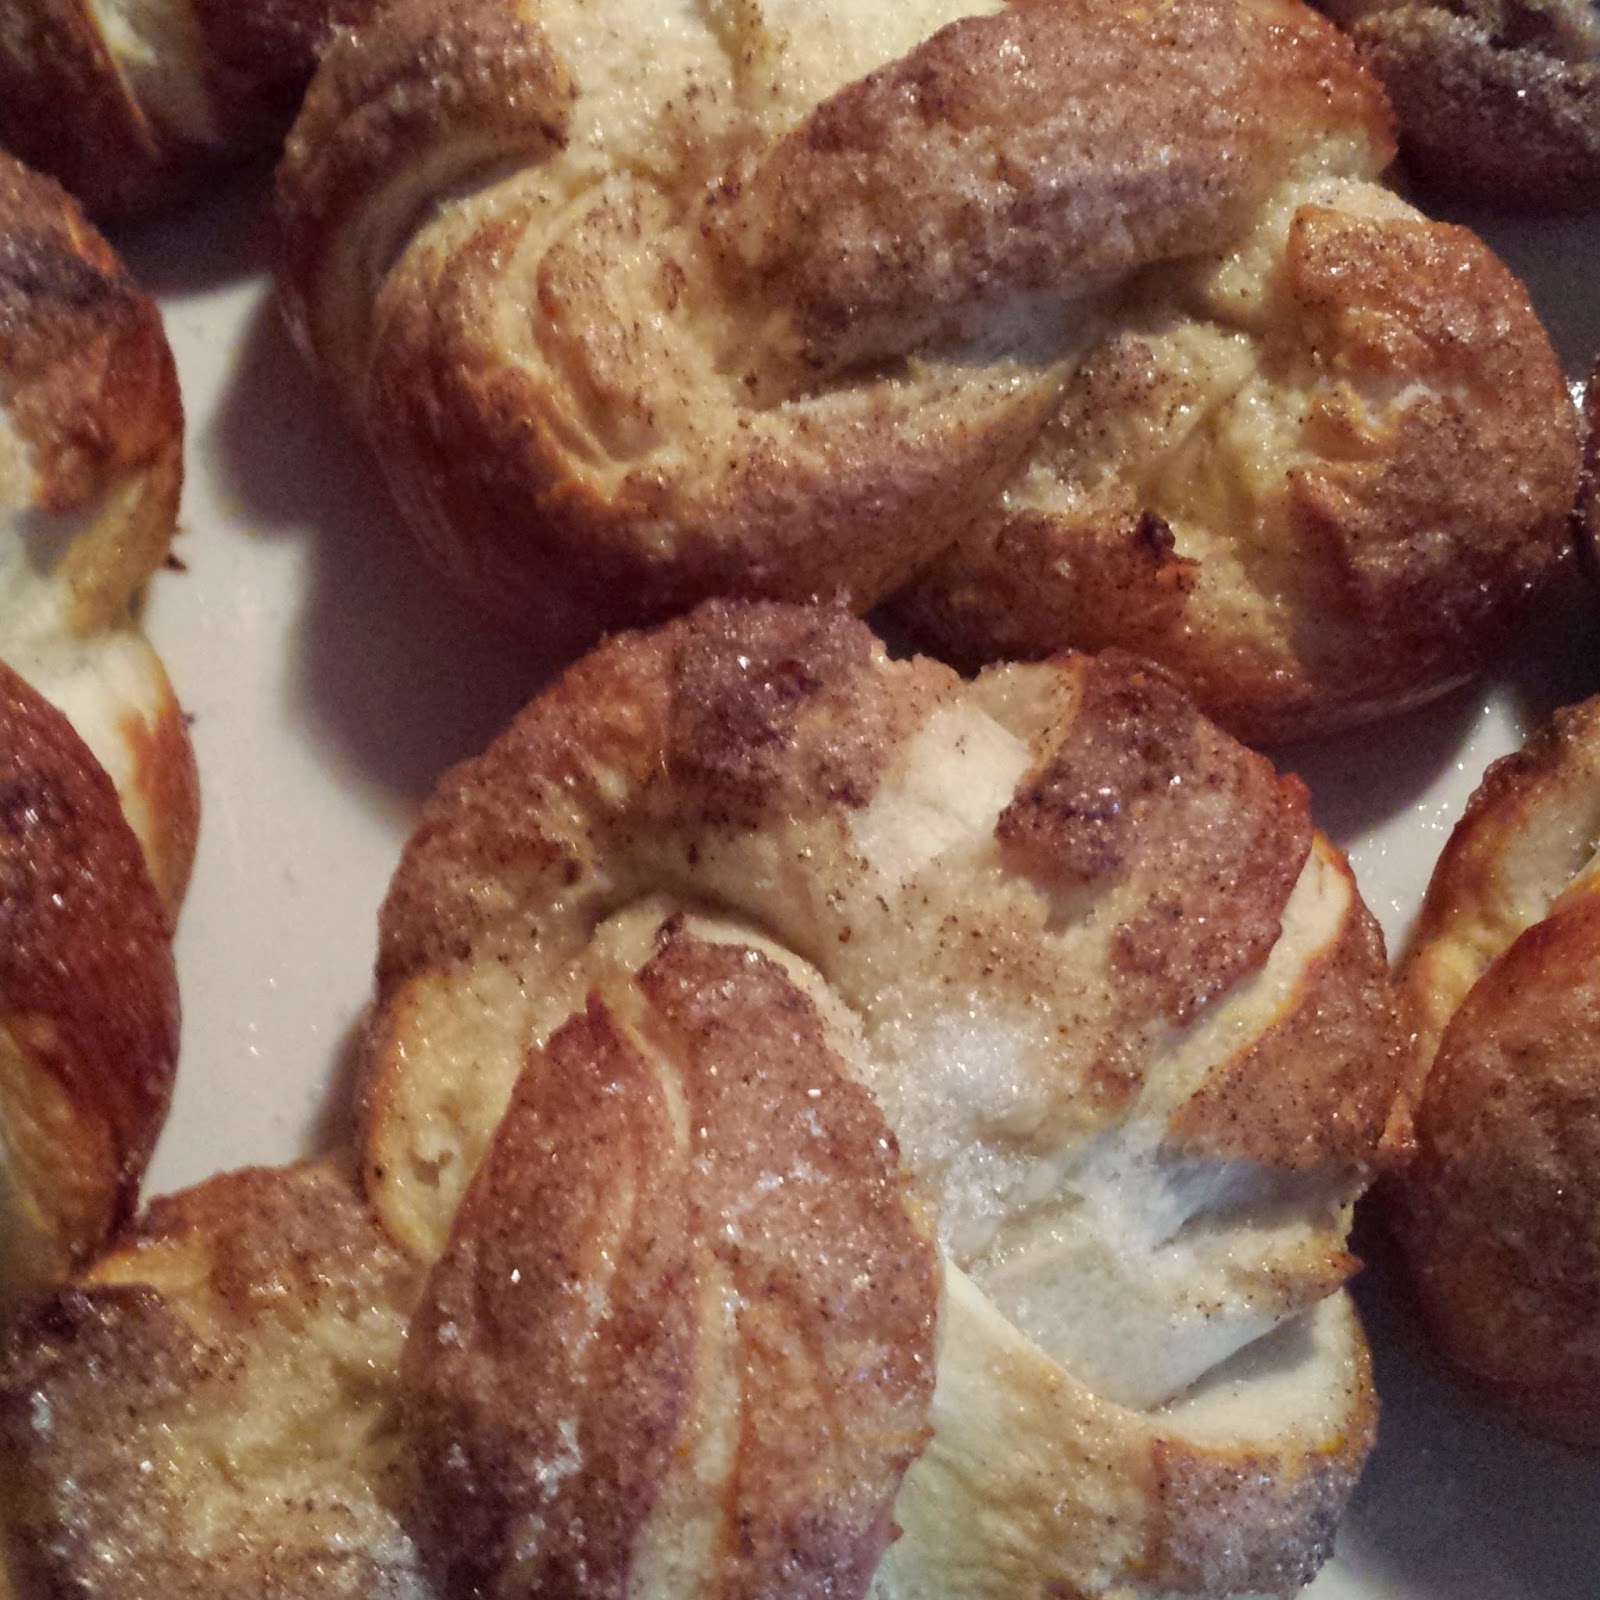
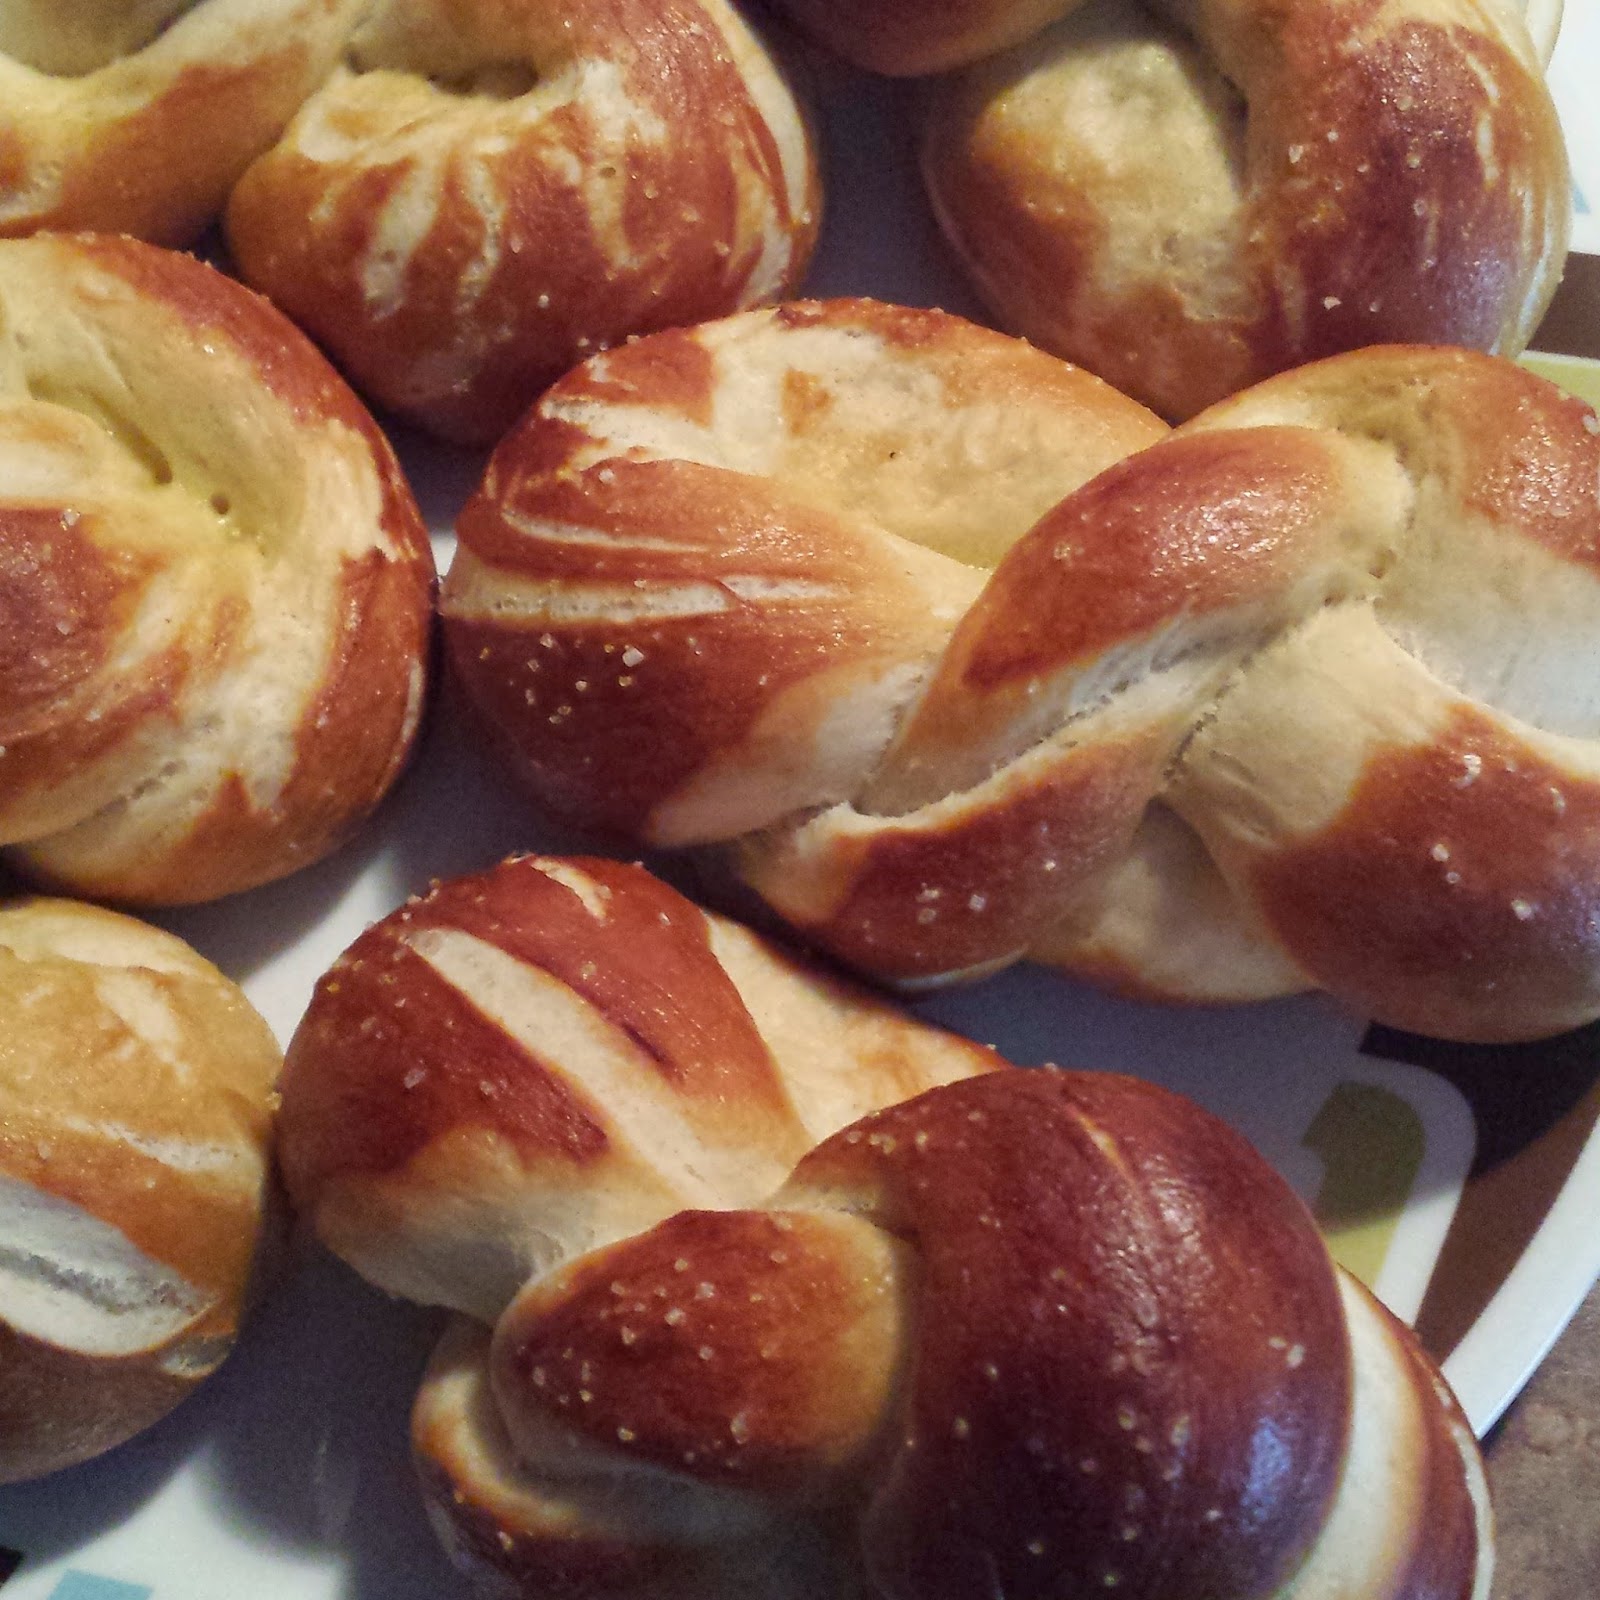
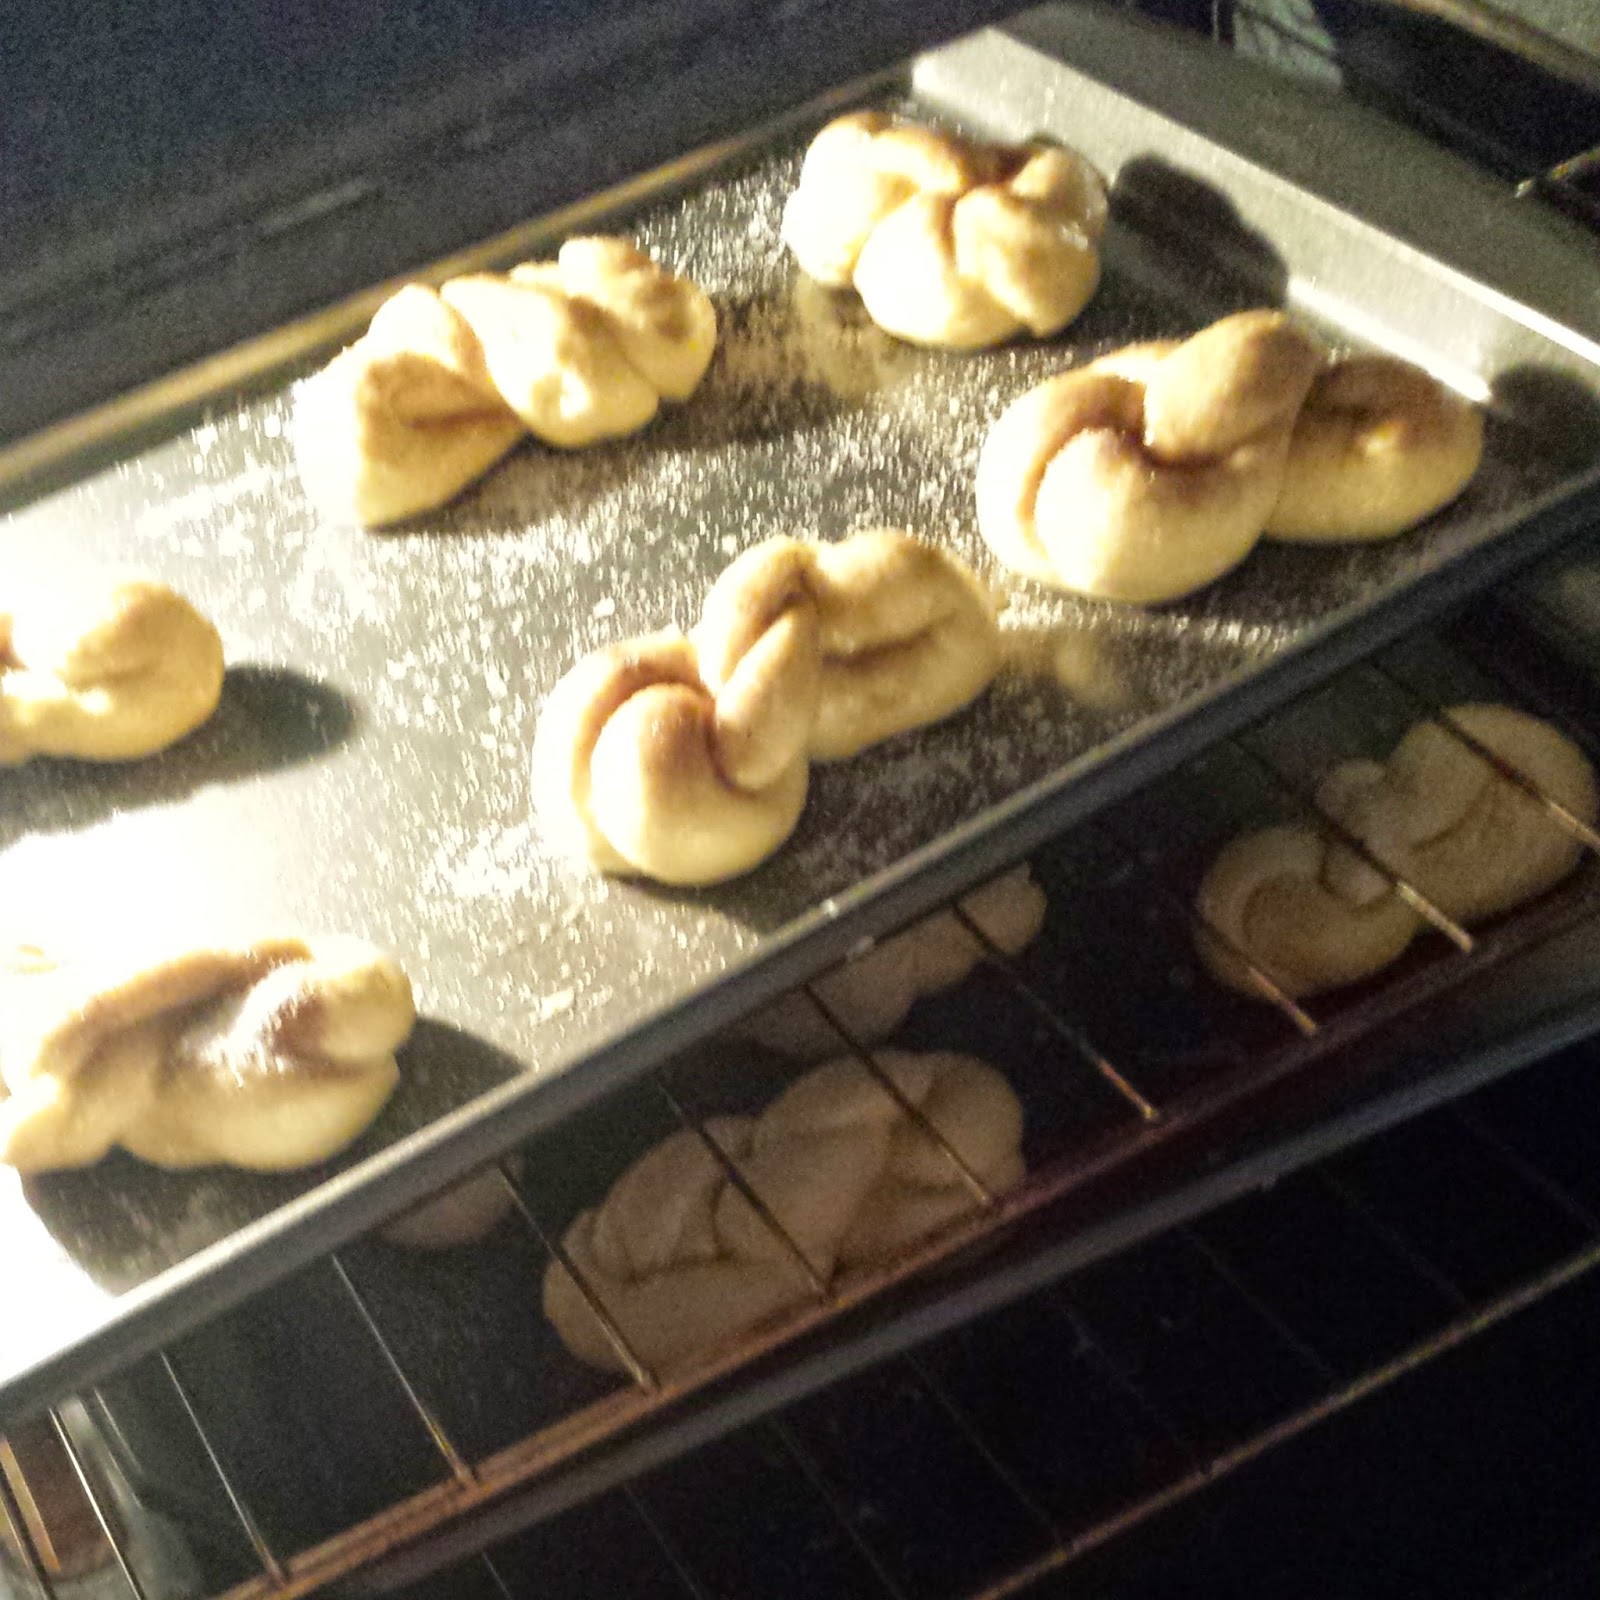
Now roll out the 12 dough balls into long ropes and twist and double twist them over and press them to secure.  (You could also just cut them into smaller pieces to have bite sized pretzels.)  One by one, place each pretzel in the boiling water for 30 seconds.  Remove from the water and place on the baking sheet.  When all have been boiled, beat egg yolk and water together and brush over each pretzel and sprinkle with kosher salt (I did half with salt and half with cinnamon sugar).

Bake until golden brown (12-14 minutes), rotating pans halfway through.  Allow to cool for 5 minutes before serving.

Thanks to Just a Taste for the recipe - find the original post here.
***Just a Taste offers the easiest solution for a warm, dark place for your dough to rise - your clothes dryer!  Turn it on for a couple of minutes to let it warm up before placing the bowl of dough inside.  Set your timer and in an hour you'll be ready to twist and bake!


Note: Kosher salt isn't something I have in my spice cabinet, so I just used some sea salt.  No, it's not the same, but still very good.

What's a soft pretzel without the dipping sauce?!  The classic choice for a salted pretzel, and in my opinion the only choice, is a drippy cheese sauce.  And for the cinnamon sugar pretzels, I'm mixing up a cream cheese dip (recipe below), but you could also pair them with a chocolate dipping sauce (also listed below), caramel sauce, or even some nut flavored chocolate spread.

Cream cheese dip
 - 4 oz cream cheese, softened
 - 4 Tbsp powdered sugar
 - 1 Tbsp milk
 - 1/2 tsp vanilla extract
(Mix cream cheese and powdered sugar together and then add the milk and vanilla extract. You can add more milk or powdered sugar to desired consistency.)


Chocolate dip
 - chocolate candy melts
(Microwave in 30 second intervals, stirring in between. Done!)

Happy baking!


Simple Dough

Hello, 2015!  While having a mini holiday/vacation from work, I've had some time to look at lots and lots of recipes.  I've been wanting to work on gathering some good base recipes that will be quick, easy, and full of flavor that I could then add other ingredients from the pantry to pull a meal together.  When I come across a recipe that allows me to "clean" up some of my favorite dishes, I've been saving them for experimenting when I have time. I came across this one just a day or 2 ago and because it said the prep time was 10 minutes I decided to try it while the babies were happy and content in their high chairs.

Pizza can be a cheap and easy meal and with this recipe, you know exactly what's in the crust and you can add some of your own extra flavorings.  This recipe literally took 10 minutes and there was enough dough for me to divide and freeze for future pizzas.

What you'll need:
   11/2 c. warm water
   2 1/4 tsp yeast
   1 tsp salt
   1 Tbsp sugar
   1/3 c. olive oil
   4 c. flour
   
What to do:
1. Pour yeast over warm water, stir and let sit.
2. In mixing bowl, add flour, salt, sugar, and mix.  Add the olive oil and use the dough hook, mix for about a minute.
3. Add yeast mixture to the flour mixture and mix until well incorporated.*
4. Remove dough from mixing bowl, shape the dough into a ball, and place in and oiled bowl, rubbing oil on the dough as well.  Cover bowl with plastic wrap and refrigerate.
5. If you're not using the dough right away, you can freeze it.

I divided the dough into 4.  Wrapped one in plastic wrap and put in the fridge. I wrapped the remaining 3 in plastic wrap and placed them in a freezer bag.

When it was time to make the pizza, I pulled the dough out of the fridge, floured the counter and dough and rolled it out.  From here, I placed it on a pizza pan and baked it for 7-10 minutes at 450.  I wanted more of a flatbread/crispy pizza.  After removing from the oven, I added my sauce and toppings (bbq, chicken, and cheese blend).  Then put it back in the oven for 10-15 minutes (I don't really know how long it baked, I couldn't set a timer because the original recipe didn't have anything specific for the dough for baking temp and time, so I just checked on it every 5 minutes).

*Step 3 is where you can add your own flavorings.  I decided to add garlic salt, crushed red pepper flakes, Italian seasoning, and parmesan cheese.  The possibilities for extra flavor are endless.

Thank you to Baking Glory.  You can find the original recipe here.

Happy baking!


Spare Time

Those of you who are mothers know that spare time is short and from what I'm learning, comes as a surprise.  Since my last post, my family has grown by 2.  Yep, that's right...2.  On June 4, we welcomed these two littles into the world and my how our lives have changed.


This morning, after their 6am feeding, I was surprised with some spare time because they chose to sleep.  Not only was I able to shower, but I managed to whip up a recipe of this Blueberry Zucchini Bread.  I found this recipe in my electric company co-op magazine and decided to save it because it's July and July is the month for an over abundance of zucchini.  Over the weekend, my parents brought me a couple zucchinis and of course one of them was destined for this recipe :)

What you'll need:
   3 eggs, lightly beaten
   1 c vegetable oil
   3 tsp vanilla
   2 1/4 c sugar
   2 c zucchini, shredded
   3 c flour
   1 tsp salt
   1 tsp baking powder
   1 tsp baking soda
   1 Tbsp cinnamon
   1 pint fresh blueberries (about 2 c)

What you'll do:
   1. Preheat oven to 350.  Lightly grease 2 loaf pans.*
   2. In large bowl, beat together eggs, oil, vanilla, and sugar.
   3. Beat in the flour, salt, baking powder, baking soda, and cinnamon.
   4. Gently fold in blueberries.*
   5. Transfer to pans.  Bake for 50 minutes or until knife inserted into center comes out clean.
   6. Cool for 20 minutes in pans, then turn out on wire racks to cool completely.

*Tips:
The recipe I have called for 4 mini loaf pans. I don't have 4 minis, so I used the 2 I have, plus a regular loaf pan, and my large muffin pan (makes 6).  I'm going out on a limb, but I'm pretty sure there's too much batter to fit into 4 mini pans.  Use your best judgement on how many pans to use for this recipe.

I would recommend rinsing the blueberries and shake to remove excess water, then toss them in a little bit of flour.  This will help the blueberries to stay suspended in the batter and not fall to the bottom.

Happy baking!


Blueberry Bread

I love fruit breads!  Who am I kidding?  I love all kinds of breads.  I found this recipe and had to try it.  I can't wait to make it again, it was easy and had amazing flavor with fresh blueberries.

What you'll need:
   1 c sugar
   1/2 c salted butter
   2 eggs
   1c milk
   2 c flour
   2 tsp baking powder
   2 c blueberries

What you'll need to do:
1. Preheat oven to 350 and grease 9 inch loaf pan
2. Cream together butter and sugar
3. Add the eggs and milk beating well
4. Add the dry ingredients and beat until well combined
5. Add blueberries and mix by hand gently with a spatula being careful not to crush the berries.
6. Pour batter into your loaf pan and bake for 60-75 minutes.
7. Allow to cool in pan for 10 minutes before removing to finish cooling.

Thanks to Frugal Mom Eh! for this great recipe.  Click here to go to the original recipe.

Happy baking!


Cinnamon Bread

The last 7 months have been quite the wild ride for me, thus the lack of posts since July 2013.  So here's to trying to get back into blogging about the recipes I try.  I found this recipe awhile back and this past week was the perfect time for it.  I usually make something to take to staff meetings at work, but time wasn't on my side the night before the meeting, so I whipped it up and took something in on Friday.  This is such an easy recipe and it's great with your morning coffee.

The recipe comes from Redfly Creations.  It's her take on Amish Cinnamon Bread.  This recipe will make 2 loaves, but easy to halve.

Cinnamon Bread


Ingredients for batter
- 1 c. butter, softened
- 2 c. sugar
- 2 eggs
- 2 cups of buttermilk (recipe below)
- 4 cups of flour
- 2 tsp of baking soda

Ingredients for cinnamon mixture
- 2/3 c. sugar
- 2 tsp of cinnamon

What to mix
1. cream together butter, sugar and eggs
2. add milk, flour, baking soda
3. pour half of the batter into 2 greased loaf pans
4. in separate bowl, stir together sugar and cinnamon
5. sprinkle 3/4 the cinnamon sugar mixture on the batter in the pans
6. pour on remaining half of batter
7. sprinkle remaining cinnamon sugar mixture on top of the batter
8. swirl with a knife
9. bake at 350 for 45-50 minutes (or until toothpick comes out clean)
10. let cool in pan for 20 minutes before removing

It's just that easy.  Redfly also mentions that you can make this in muffin tins for individual portions that are easier for freezing and reheating.

Don't have buttermilk, here's what you do.  Measure out needed amount of milk, add 1 tbsp of vinegar or lemon juice for every cup, let sit, stir, and add to recipe.

My tips:
* swirl the first layer of cinnamon sugar mixture into the first half of the batter
* I think I ended up baking my 2 loafs for closer to 60 minutes, but each oven is different, so use the toothpick method to be sure

I got recipe from over here, special thanks to Redfly Creations.

Happy baking!


An Egg-free/Dairy-free Happy Birthday

When my co-worker asked me to make a smash cake for her son's first birthday, I really didn't know what I was in for.  She asked me months in advance and I started looking for ideas on what she was wanting.  Then the call came.  About 3 weeks before the party, I get a phone call.  "Hi....so...how hard would it be to make a cake that is egg-free and dairy-free...?" Um.....yeah.  Not what I was expecting, but I'm pretty good at Google-ing and pretty handy with Pinterest, so I knew how to search for a recipe.  So after a quick search, I soon discovered I had already pinned a recipe that was both egg-free and dairy-free....I must have known I was going to need it at some point.  (Oh...and this recipe is also butter-free!)

And what's a birthday without a cake...not to mention a 1st birthday?!  My co-worker's son had recently been tested for allergies and was even given an Epi-pen for the egg and dairy allergies.  So now, this cake was going to be even more special.  It was not only going to be his first cake, but the only cake he might ever be able to eat!

The cake is called Crazy/Wacky Cake or Depression Cake...what would be really depressing would be life without cake.  This cake was created back in the Great Depression when eggs, milk, and sugar were scarce or too expensive.  I tried this cake before I finished decorating it for the birthday boy and as a "I'll take extra eggs, dairy, and butter in my cake" kind of girl, I could tell there was something different about this cake.  But...if I had gone to a party and was served a slice of this cake with frosting on it, not knowing that it was missing some key cake-making ingredients, I might not have been able to tell a difference.

Birthday boy's mom reported that he loved his cake...mission accomplished!

Now...you may be asking yourself...if he is dairy-free, how did you make the buttercream icing?  Buttercream by its name is made with butter and butter is most certainly not dairy-free.  And even though you can find margarine that is dairy free or close to it - margarine doesn't work well when making buttercream.  Over the last several years, shortening has gone through a transformation in attempts to make it healthier.  Turns out when you change shortening, you now need to find another fat to make really good buttercream and really good pie crust.  An alternative was needed.  Welcome, sweetex.  A little info on sweetex can be found here.  Sweetex is what I've used to make buttercream for the last couple of wedding cakes I've made.  The icing turns out bright white, has a great consistency, and tastes great.

The site where I found this recipe also stated that other's have made this recipe with gluten-free flour mixes and it turns out great.  Sweet Little Bluebird also posted other recipes for other flavors of Crazy/Wacky Cake on her site.  Special thank you to Sweet Little Bluebird for all of these great allergy-friendly recipes.

Crazy/Wacky Cake - Chocolate
Crazy/Wacky Cake - Vanilla and Spiced
Crazy/Wacky Cake - Lemon
Crazy/Wacky Cake - Coffee & Kahlua
Crazy/Wacky Cake - In a Mug

Now those of you who have egg and dairy allergies can have your cake and eat it too!

Happy birthday and happy baking!


Balsamic...savory and sweet

Summer is in full swing and that means tomatoes and strawberries are readily available.  Another thing I found at the grocery store this week...buy one, get one bruschetta bread slices.  I haven't had bruschetta since 2007 when I took a little trip to Italy and I've never tried making it, until tonight.  I did a search for bruschetta and came across the recipe from The Pioneer Woman and I was sold.  Click here for the recipe.

A simple and delicious summer appetizer.


Now for something sweet...
I've been wanting to grill fruit for awhile now and since we already had the grill fired up for dinner, I decided to try my hand at grilled strawberries.

You'll need:
   strawberries (hulled and sliced in half)
   balsamic vinegar
   sugar
  • Pour a small amount of balsamic vinegar in a bowl and add in sliced strawberries, stir to coat.
  • Then roll strawberries in sugar and thread on a grilling skewer.
  • Places skewers directly on grill and leave for 3-5 minutes (depending on temperature of grill).
  • Turn and repeat.
  • Remove from skewers and serve in anyway you like...on pound cake, ice cream, cheesecake, whipped topping, or just eat by themselves. 


Happy grilling!


Incomplete

As a student, the word "incomplete" written at the top of your assignment was something you didn't want to see.  Just a heads up...I'm going to rant about a couple of things in this post.

Those of you who are on Pinterest: I don't know your method of pinning, but here's what I do.  I'm not saying my method is the best, but I don't want to pin something and then go back later and open the pin to find it only leads to a broken link or just the homepage of the website where I then have to go searching for the exact thing I was looking for OR a completely random site.

When I am scrolling through all the greatness of Pinterest and I come across a pin I'm interested in, I click on it and make sure that it leads me to where I ultimately want to go.
 - If it's a broken link, I don't pin that one - I then go and search for that item in the Pinterest search bar and open the pins until I find a link that works and is correct.
 - If I click on the pin and it takes me to the homepage of the website - I find the search bar on that page and search for the item I was looking for (this mostly happens with food blogs) and then I create the pin myself using the correct page and photo of the item.
 - If I click on the pin and it leads me to that random site that has nothing to do with the cupcake recipe I was looking for....I go back to the Pinterest search bar and try to find another pin that has the correct link.  Sometimes this doesn't even work BECAUSE...there are a lot of people not checking the pins before they pin them!

If it's something I really want to save for future use, I use Google to find what I'm looking for and create my own pin for the item.  And there are those times when you go to look at the recipe from the pin and you click on the picture and all it does is open another browser window and show you an enlarge version of the picture you already clicked with no other information...please tell me this happens to other people?!  (This is really the most frustrating with DIY projects and recipes.)  SO...as a plea to all my fellow pinners - please check your pins!

Ok, first rant down.  Second rant begins now:  to those of you out there that are posting recipes online - be sure you include all of the directions/ingredients!  Yes, mistakes happen and things get over looked, but go back in a couple of days and re-read your recipe to make sure you haven't forgotten anything.

My example of this: Bo-Berry Biscuits

I found and saved this recipe awhile back and then was reminded of it this week when my best friend from high school pinned it and it showed up in my Pinterest feed.  I love blueberries and especially in breakfast treats and wanted to treat myself a little on my day off, so I picked up some fresh blueberries on my way home last night.  I didn't want to use dried like the recipe also suggests because I wanted the juicy berries to be throughout these biscuits.  If you love blueberry muffins you know what I mean...that bite when you are reminded of blueberry greatness.  So fresh berries and they a little pricey, so I was hoping even more that this recipe turned out amazing to know that money was well spent on these berries.

I read through the recipe before I started and guess what - it was incomplete!  No where in the recipe did it say where I needed to add the berries.  Now, I've been doing things in the kitchen since I little, just sitting on the counter watching, so I could felt confident that I could solve this dilemma.  (On a side note - the person who copied this recipe for posting did include the link to the site where they found the recipe.  This wasn't something I noticed on my phone when using it to pull up the recipe.)

Well after adding the berries at the end and trying to make it work as best as I could, I ended up not actually making them into biscuits.  I was so frustrated that the recipe left out when to add them!  Yes, I realize that it is something so minor to get upset about, but tell me you haven't started a recipe and then realized it wasn't complete.

Anyway, instead of trying to roll out the mess of ball of dough I had created (my fresh berries were being destroyed trying to incorporate them in the dough), I put it in an 8x8 glass baking dish and baked it that way.  I'm not sure how long it was in the oven, but I checked on it a couple of times and then checked it with a toothpick.  It was probably in there 15-20 minutes (it was much thicker in the baking dish than the intended biscuits would have been).

Rant #2 complete.

Even with an incomplete recipe to work with, the end result is pretty amazing.  And yes, I did enjoy some of it for my breakfast this morning.

Click here for the correct link to the recipe for these Bo-Berry Biscuits.

Happy baking!